How to Check the DPI and Resolution of an Image


Written by Casey Botticello
Disclosure: Some of the links below are affiliate links, meaning that at no additional cost to you, I will receive a commission if you click through and make a purchase. Read our full affiliate disclosure here.
Anyone who works with images in a serious environment has heard the words “DPI” and “resolution” before.
Or maybe you’re just getting into photography and digital image manipulation, and want to know what these words mean.
DPI and resolution are two tools that can help you understand your images. In this article, we will be covering briefly what they mean before exploring how to check the DPI and resolution of an image on various image manipulation platforms.
Let’s get into it!
What is DPI?

DPI is an acronym for ‘Dots Per Inch’. Although this seems fairly simple, DPI actually has some confusing usage across the field of digital images.
Originally, DPI meant the number of dots printed per inch of an image. So, you’d have an image with a size of, say, 1200 x 1500 dots. Then, if you told the printer to print at 300DPI, it would produce an image that was 4×5 inches.
A higher DPI would then produce a smaller image, while a smaller DPI would produce a larger image.
However, DPI typically means something a bit different nowadays– especially in the context of digital images. It’s often conflated with the term ‘pixels per inch’, or PPI.
PPI and DPI do share some properties, so it’s not entirely unusual that they would be mixed up occasionally.
Higher DPI or PPI means that you’ll have a higher quality image, while lower DPI or PPI will lead to a pixelated or grainy image.
Similarly, resolution is a term that is used in different ways. To most people, a high resolution image is just another way to say a high quality image. So, if you’ve run into the word before, you probably recognize it as a synonym for quality.
However, that’s not always the case! Strictly speaking, resolution is the number obtained when the horizontal pixel count of an image is multiplied by the vertical pixel count.
For example, the resolution of a 1200 x 1500 pixel image would be 1800000 pixels. In essence, resolution means “how many pixels are in this image”.
Normally, we’d write resolution in units of megapixels or MP, and so our image would have a resolution of 1.8MP.
For the rest of the article, we’ll use these terms in the following way:
- DPI means ‘pixels per inch’, as this is how the image programs we’ll be looking at treat it
- Resolution means DPI. Actual resolution means the resolution given by the same kind of calculation we did above.
One more thing! It’s possible to have different DPI values for horizontal and vertical axes of an image. In this case, the image will always be printed with the lower DPI value.
This is because printers can’t magically insert dots to your image if they aren’t already there.
So, to make sure that you get the DPI value you want, you should make sure that you either have the same value on your horizontal and vertical axes, or that your smallest DPI is the one you want.
How to Check the DPI and Resolution of an Image with Windows File Explorer
There are a few ways to check the DPI of an image using Windows file explorer.
You can either check an individual image file’s properties, or list the DPI in one column of the file explorer window.
Individual Check

To check an image file’s properties, just open up file explorer, navigate to where the image is stored, and right click on it.
Click on ‘Properties’ and then click through the menu to ‘Details’. The DPI should be under ‘Image’, but confusingly they’ll be called ‘Horizontal Resolution’ and ‘Vertical Resolution’.
To calculate the actual resolution, use the fact that the same properties window tells you what the pixel dimensions of the image are. Just multiply these two together and divide by one million to get the resolution in megapixels.
List DPI and Resolution

Open up file explorer and find the window containing the image(s) you want to find the DPI or resolution of.
Then, click ‘View’ at the top of the file explorer, and then ‘Details’.
Now, right click any of the columns such as ‘Name’, ‘Type’, and so on — as long as you can identify the image without this column!
Choose ‘More’, then select ‘Horizontal resolution’ from the pop-up. Repeat with another column and on this one choose ‘Vertical resolution’. Now you can see the DPI of all the images in the selected folder.
How to Check the DPI and Resolution of an Image with Adobe Photoshop
- Click ‘Image’ on the top menu bar. Scroll down and select ‘Image Size’.
- In the window that appears, you’ll see a few things. Scroll down to the ‘Resolution’ box and make sure it’s listed in pixels/inch.

To find the actual resolution of an image, use the same ‘Image’ and ‘Image size’ navigation. This window has ‘Dimensions’ at the top — you can use these to calculate the resolution by multiplying them together.
Although the ‘Image Size’ option looks almost like it’s in MP– it’s not! Be careful not to get this mixed up.
How to Check the DPI and Resolution of an Image with GIMP
- Select ‘Image’ from the menu bar. Scroll down to ‘Image Properties’ and select this.
- Look for ‘Image Properties’, which will give you the PPI both horizontally and vertically. Choose the lowest one for the image’s overall DPI.

To find the actual resolution, take the ‘Size in pixels’ values and multiply them together, then divide by one million to get the resolution in megapixels.
How to Check the DPI and Resolution of an Image on a Mac
- Open the Finder app and navigate to the folder where your image is stored.
- Right click the file and select ‘Open With’, then ‘Preview’. This will open a new Preview app window.
- In the menu bar, click ‘Tools’, then ‘Show Inspector’. Alternatively, you can press CMD+I.
- You’ll get a popup with ‘Image DPI’. This is the value you want!

To find the actual resolution, take the ‘Image Size’ option in the same popup as ‘Image DPI’ and multiply the values together. Divide by one million to get the resolution in megapixels.
How to Check the DPI and Resolution of an Image with Illustrator
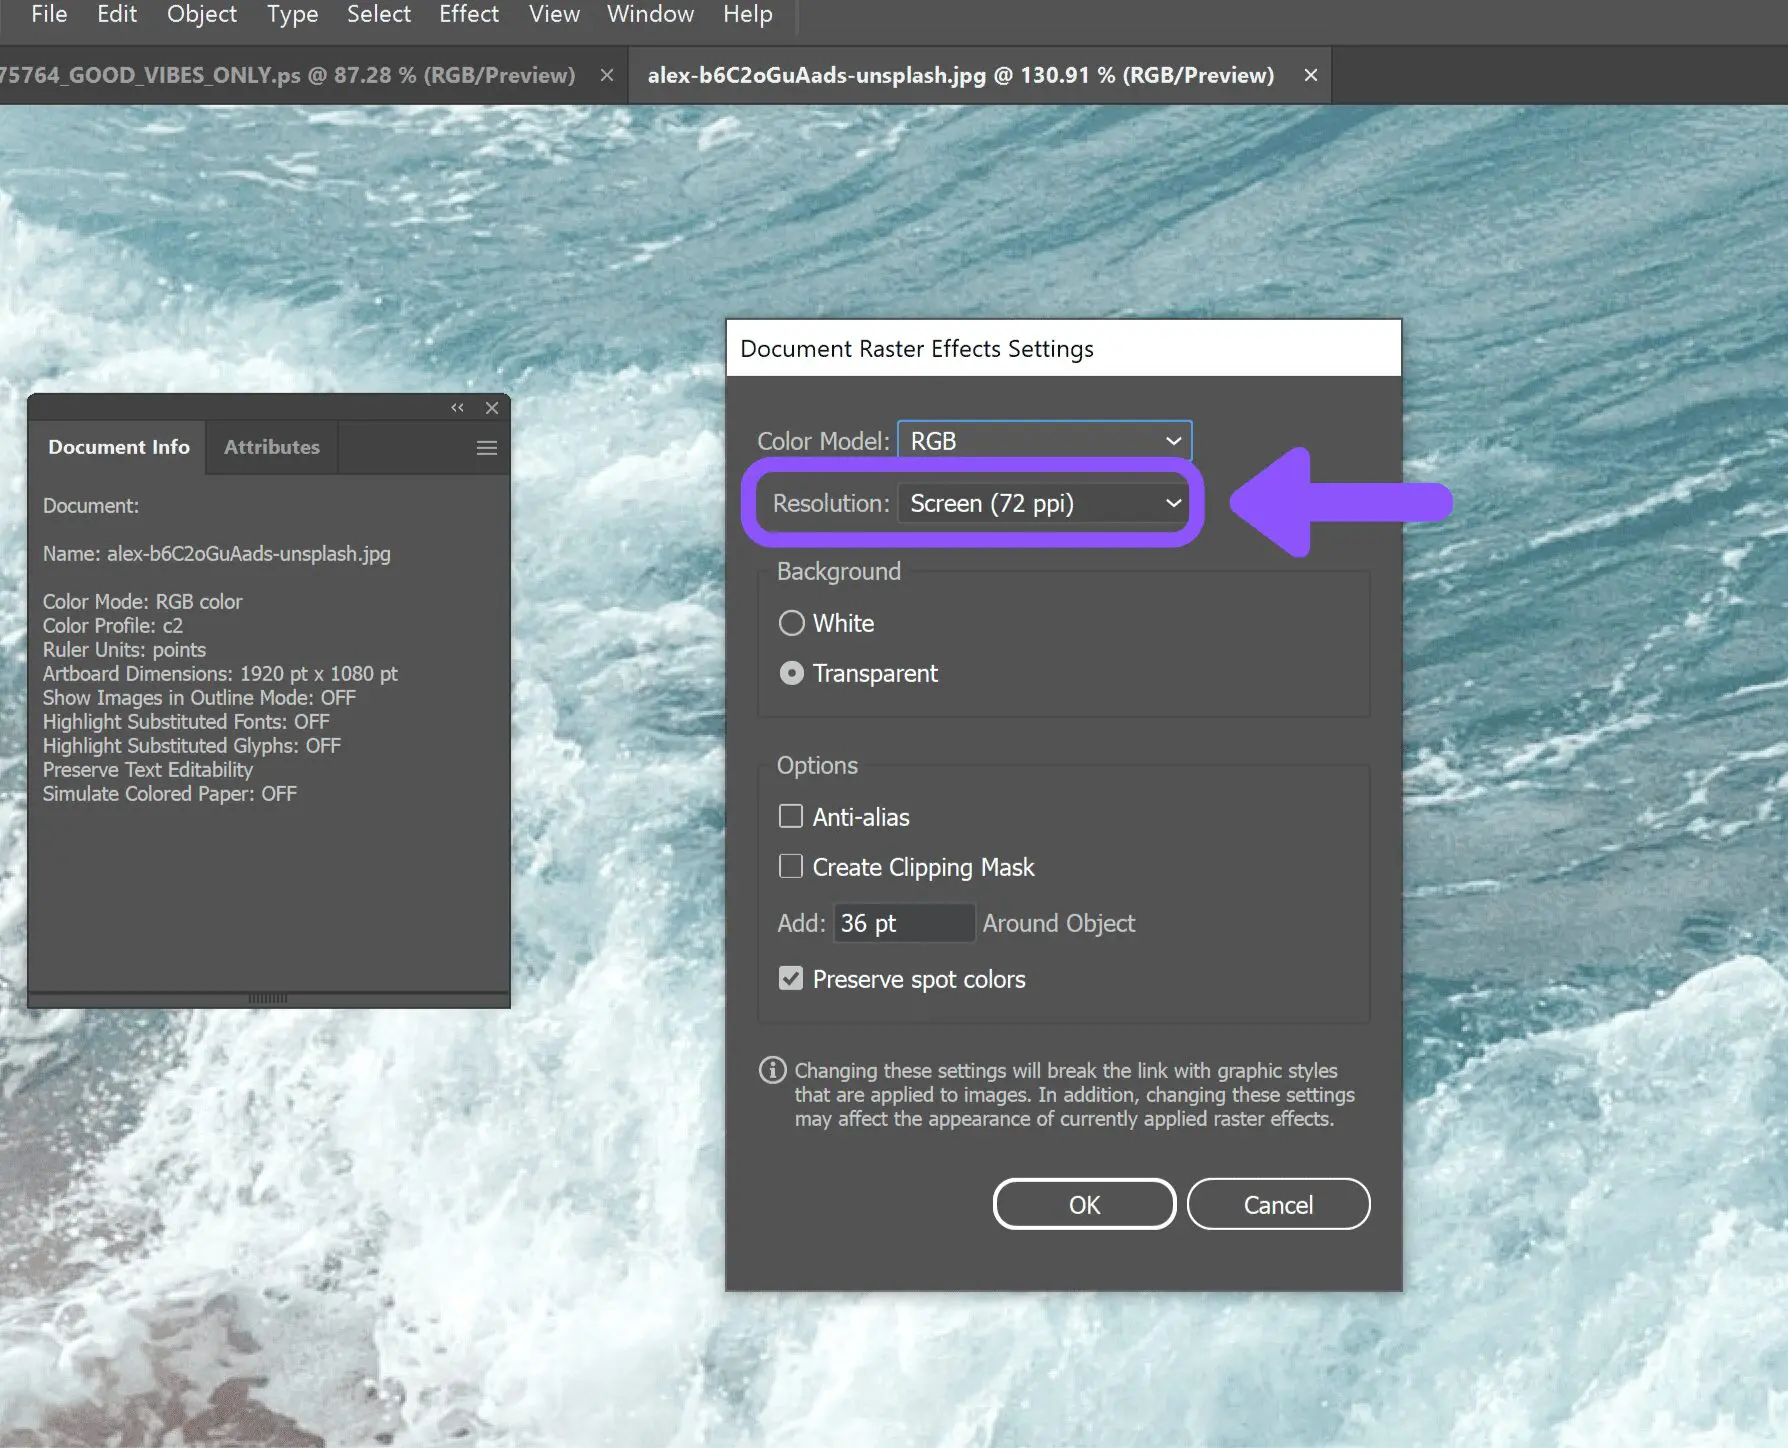
- Click on ‘Window’ on the toolbar.
- Click ‘Document Info’.
- The DPI will be listed under ‘Resolution’.
To find the full resolution, look for pixel dimensions in the ‘Document Info’ window that you opened in step 2 above, and multiply these together, then divide by one million.
How to Check the DPI and Resolution of an Image with Microsoft Word
Word is a bit of a weird program with regards to image DPI and resolution, in that it will automatically change your image’s DPI to the default value for the document.
As a result, you can’t normally check an individual image’s DPI in Word — you have to check the default DPI it is applying to the whole document:
- Click ‘File’ and ‘Options’.
- Click ‘Advanced’.
- Scroll down to ‘Image Size and Quality’. You’ll see a ‘Default resolution’ box with a number in pixels per inch, which is what you want! You can also change this number if you want a higher or lower default image DPI.

Finding the actual resolution of an image is more difficult — although Word does provide an image size viewer, it’s in centimeters, not pixels.
You can always right click on the image and save it as a separate file, then use the instructions for either Windows or Mac, discussed above, to find its dimensions.
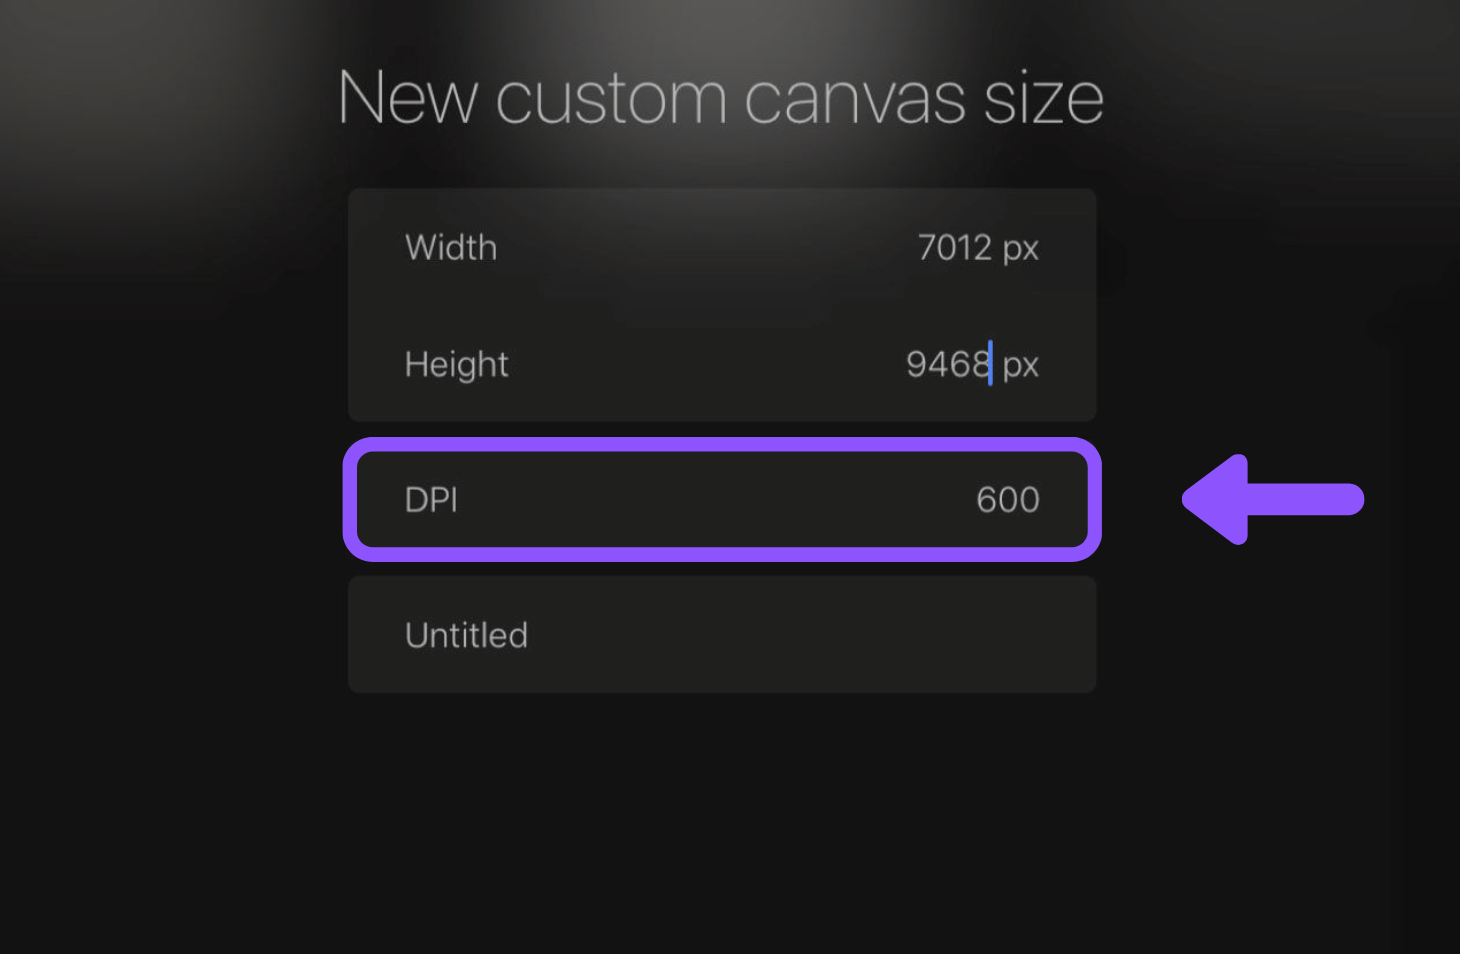
How to Check the DPI and Resolution of an Image with Procreate
- Click on the ‘Actions’ tab in the toolbar — it’s marked with a wrench symbol.
- Click on Canvas, then at the bottom of the next menu click ‘Canvas Info’.
- Click ‘Dimensions’. ‘Now you can see ‘DPI’ at the bottom of the menu.
To calculate the actual resolution, follow the same steps until you reach the final menu. Then multiply the ‘Pixel width’ and ‘Pixel height’ values together and divide by one million to get the actual resolution in megapixels.
Final Thoughts
Knowing the DPI and resolution of an image is very useful for people who work with digital images extensively, or even just for hobbyists who want to know a bit more about what they’re doing.
Not only that, but DPI is commonly asked for by professional printers as well. They use DPI in order to determine whether your image is of the correct quality for their hardware.
So, not only does knowing the DPI tell you how good your image will look, it also helps you transfer it from digital to print format.
Now, no matter what software or operating system you’re working with, you’ll now be able to refer back to this article in order to find the DPI of any image. Hopefully you’ll now be better equipped to find the properties of your images!