Disclosure: Some of the links below are affiliate links, meaning that at no additional cost to you, I will receive a commission if you click through and make a purchase. For more information, read our full affiliate disclosure here.
Great graphic design is the secret super power behind many content creators. However, for many content creators, graphic design is either too time consuming to tackle or too expensive when outsourced to professional designers. Luckily, Canva has made creating your own custom designs much easier. In this tutorial, our team of design experts will cover how to create a table in Canva.
How to Create a Table in Canva
1. Navigate to the Elements Section to Activate Your Table
Go to the ‘Elements’ section and scroll down to the Tables.
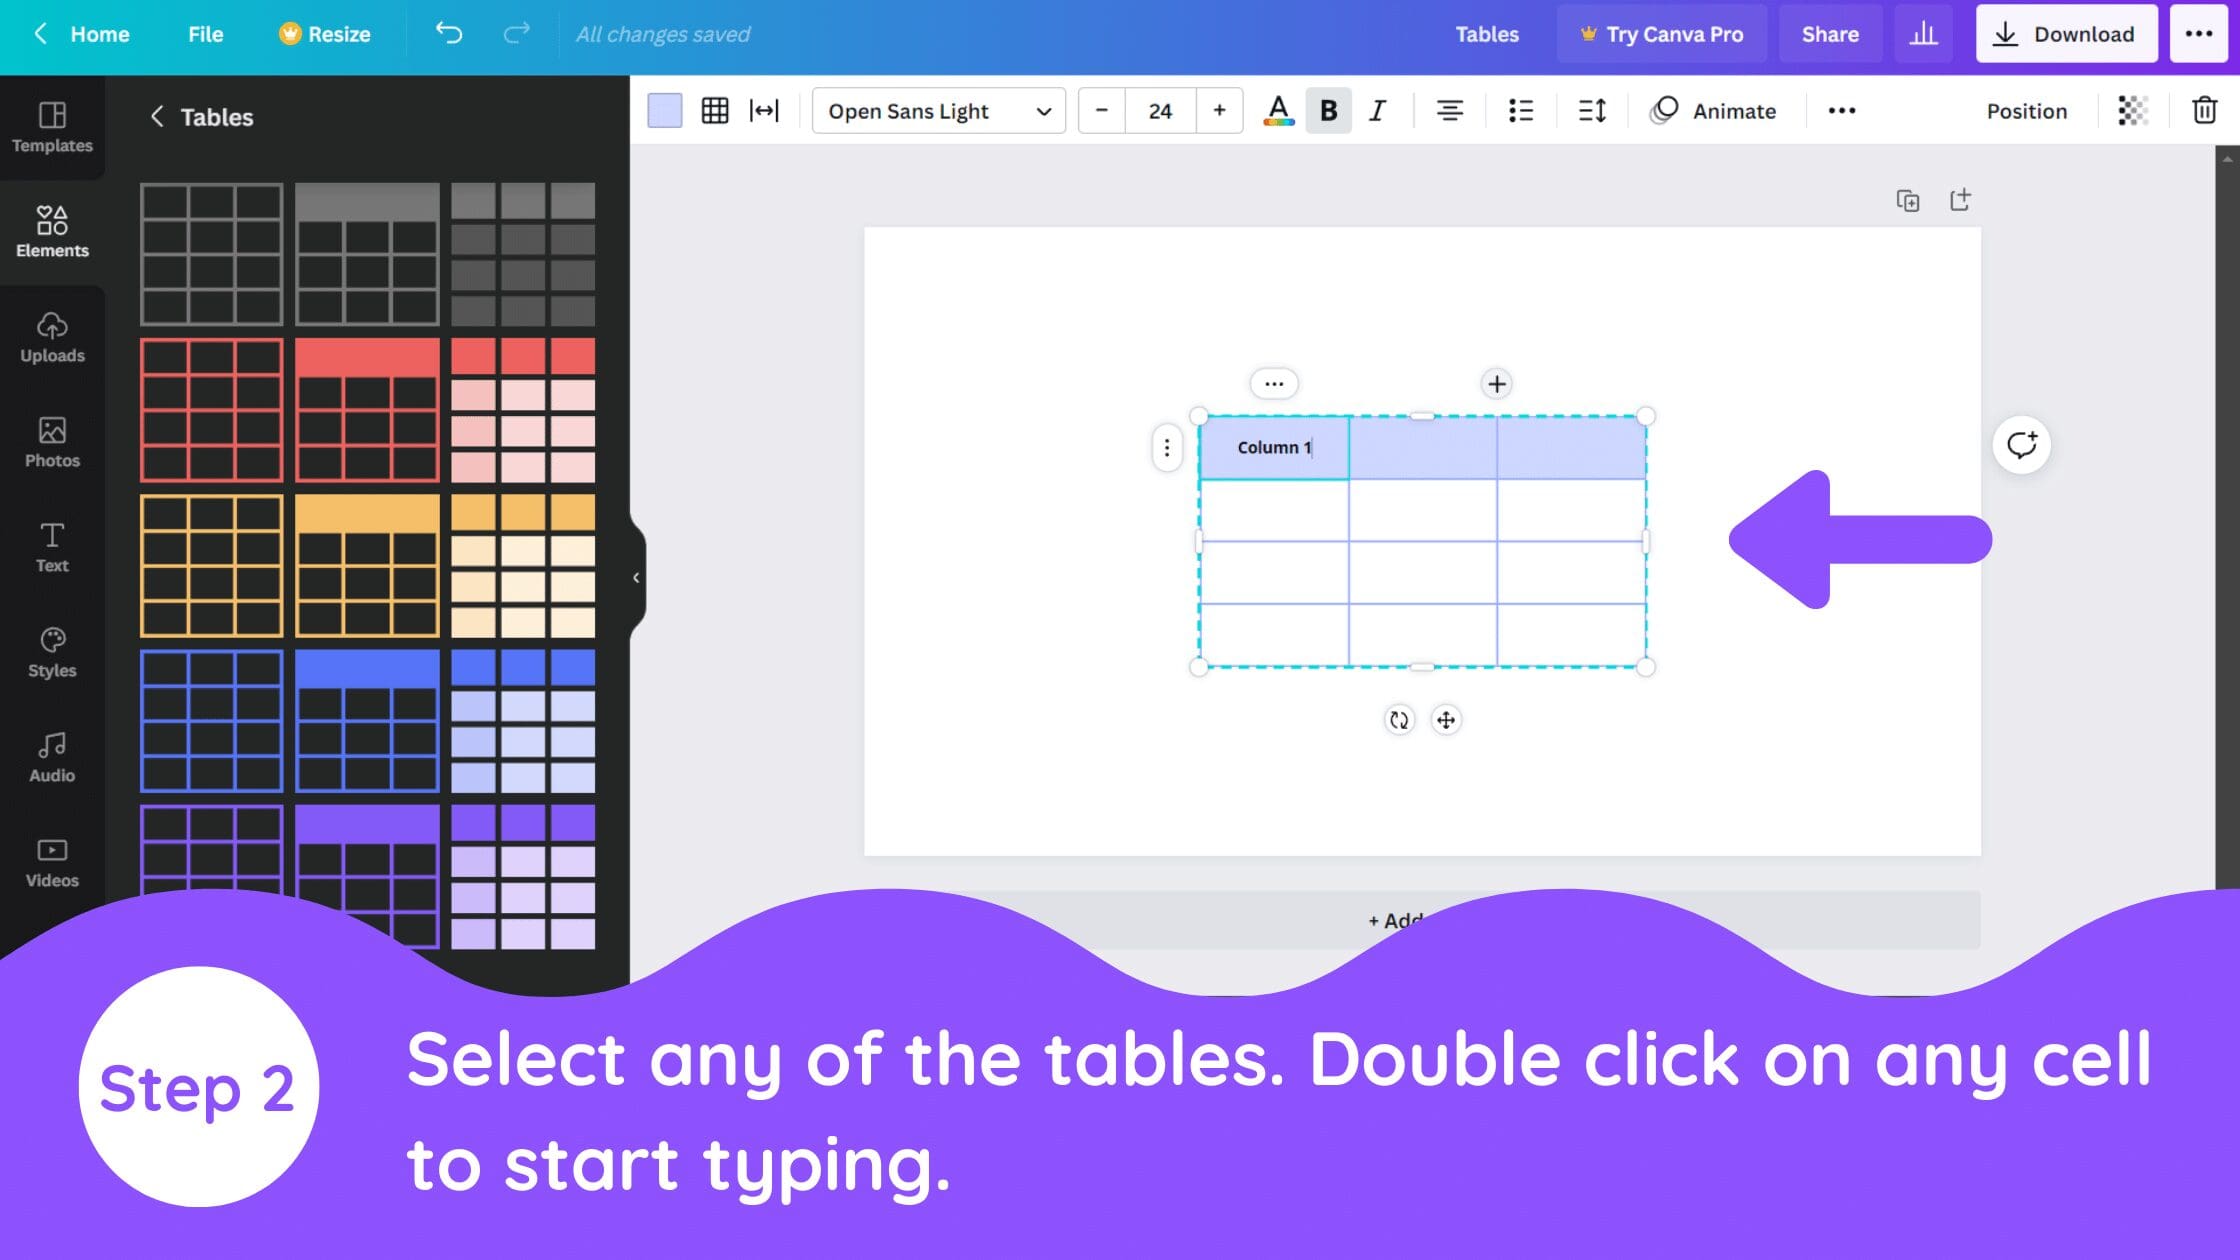
2. Choose Your Type of Table
You will see the table is automatically inserted. You can double-click on any cell to start typing into the cells.
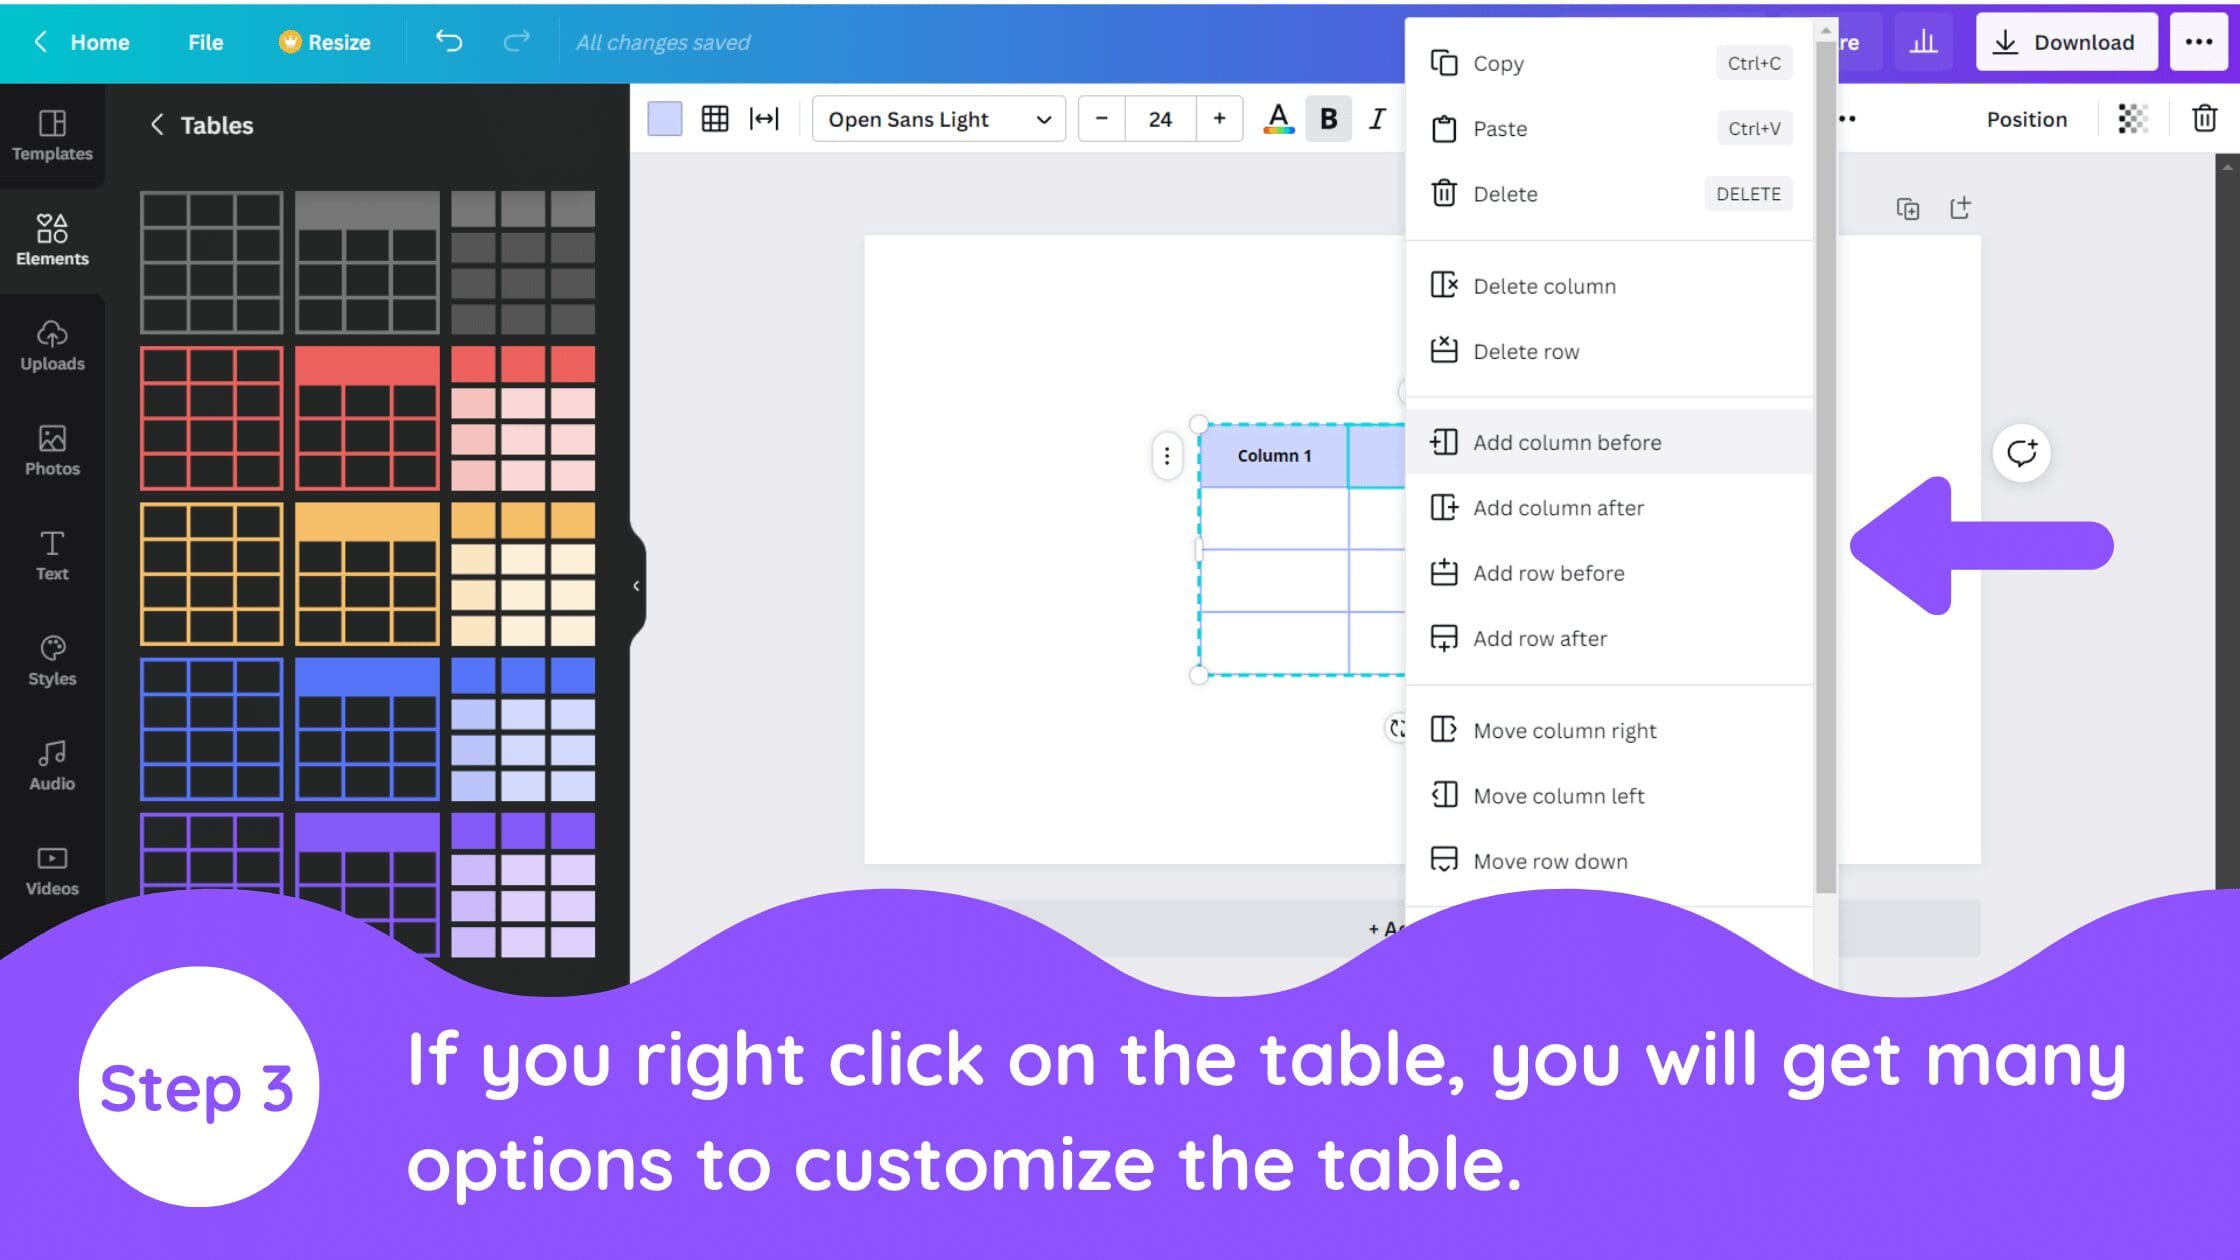
3. Customize Table
If you right-click on the table, you will see different options like, adding the rows/columns, Deleting the rows/columns, Moving the rows/columns, etc.
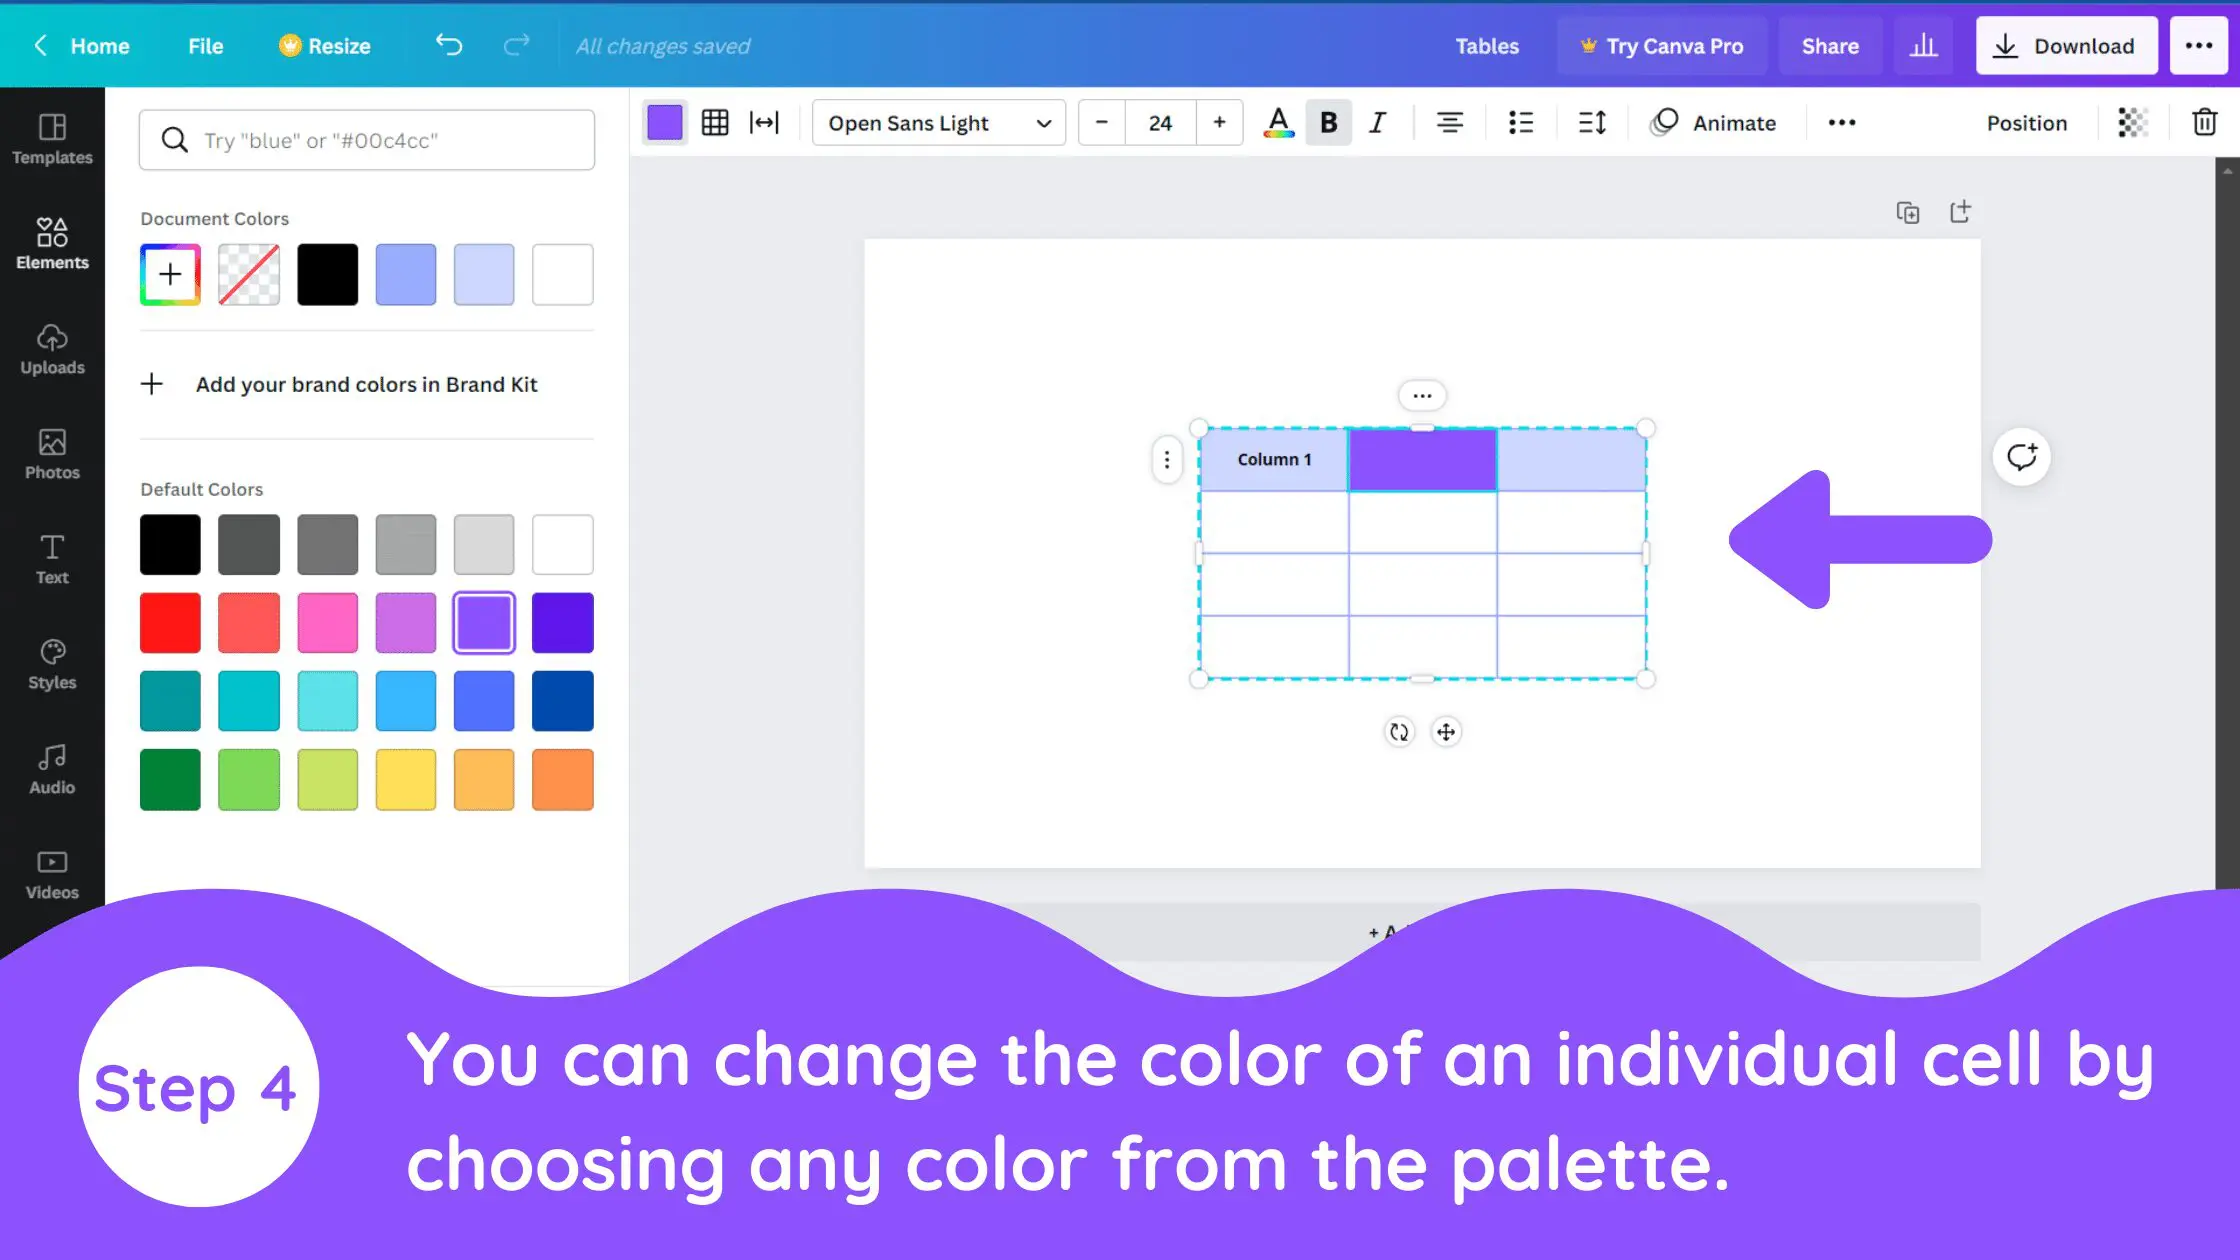
4. Adjust Cell Color Palette
You can also change the color of an individual cell using the ‘Color’ option.
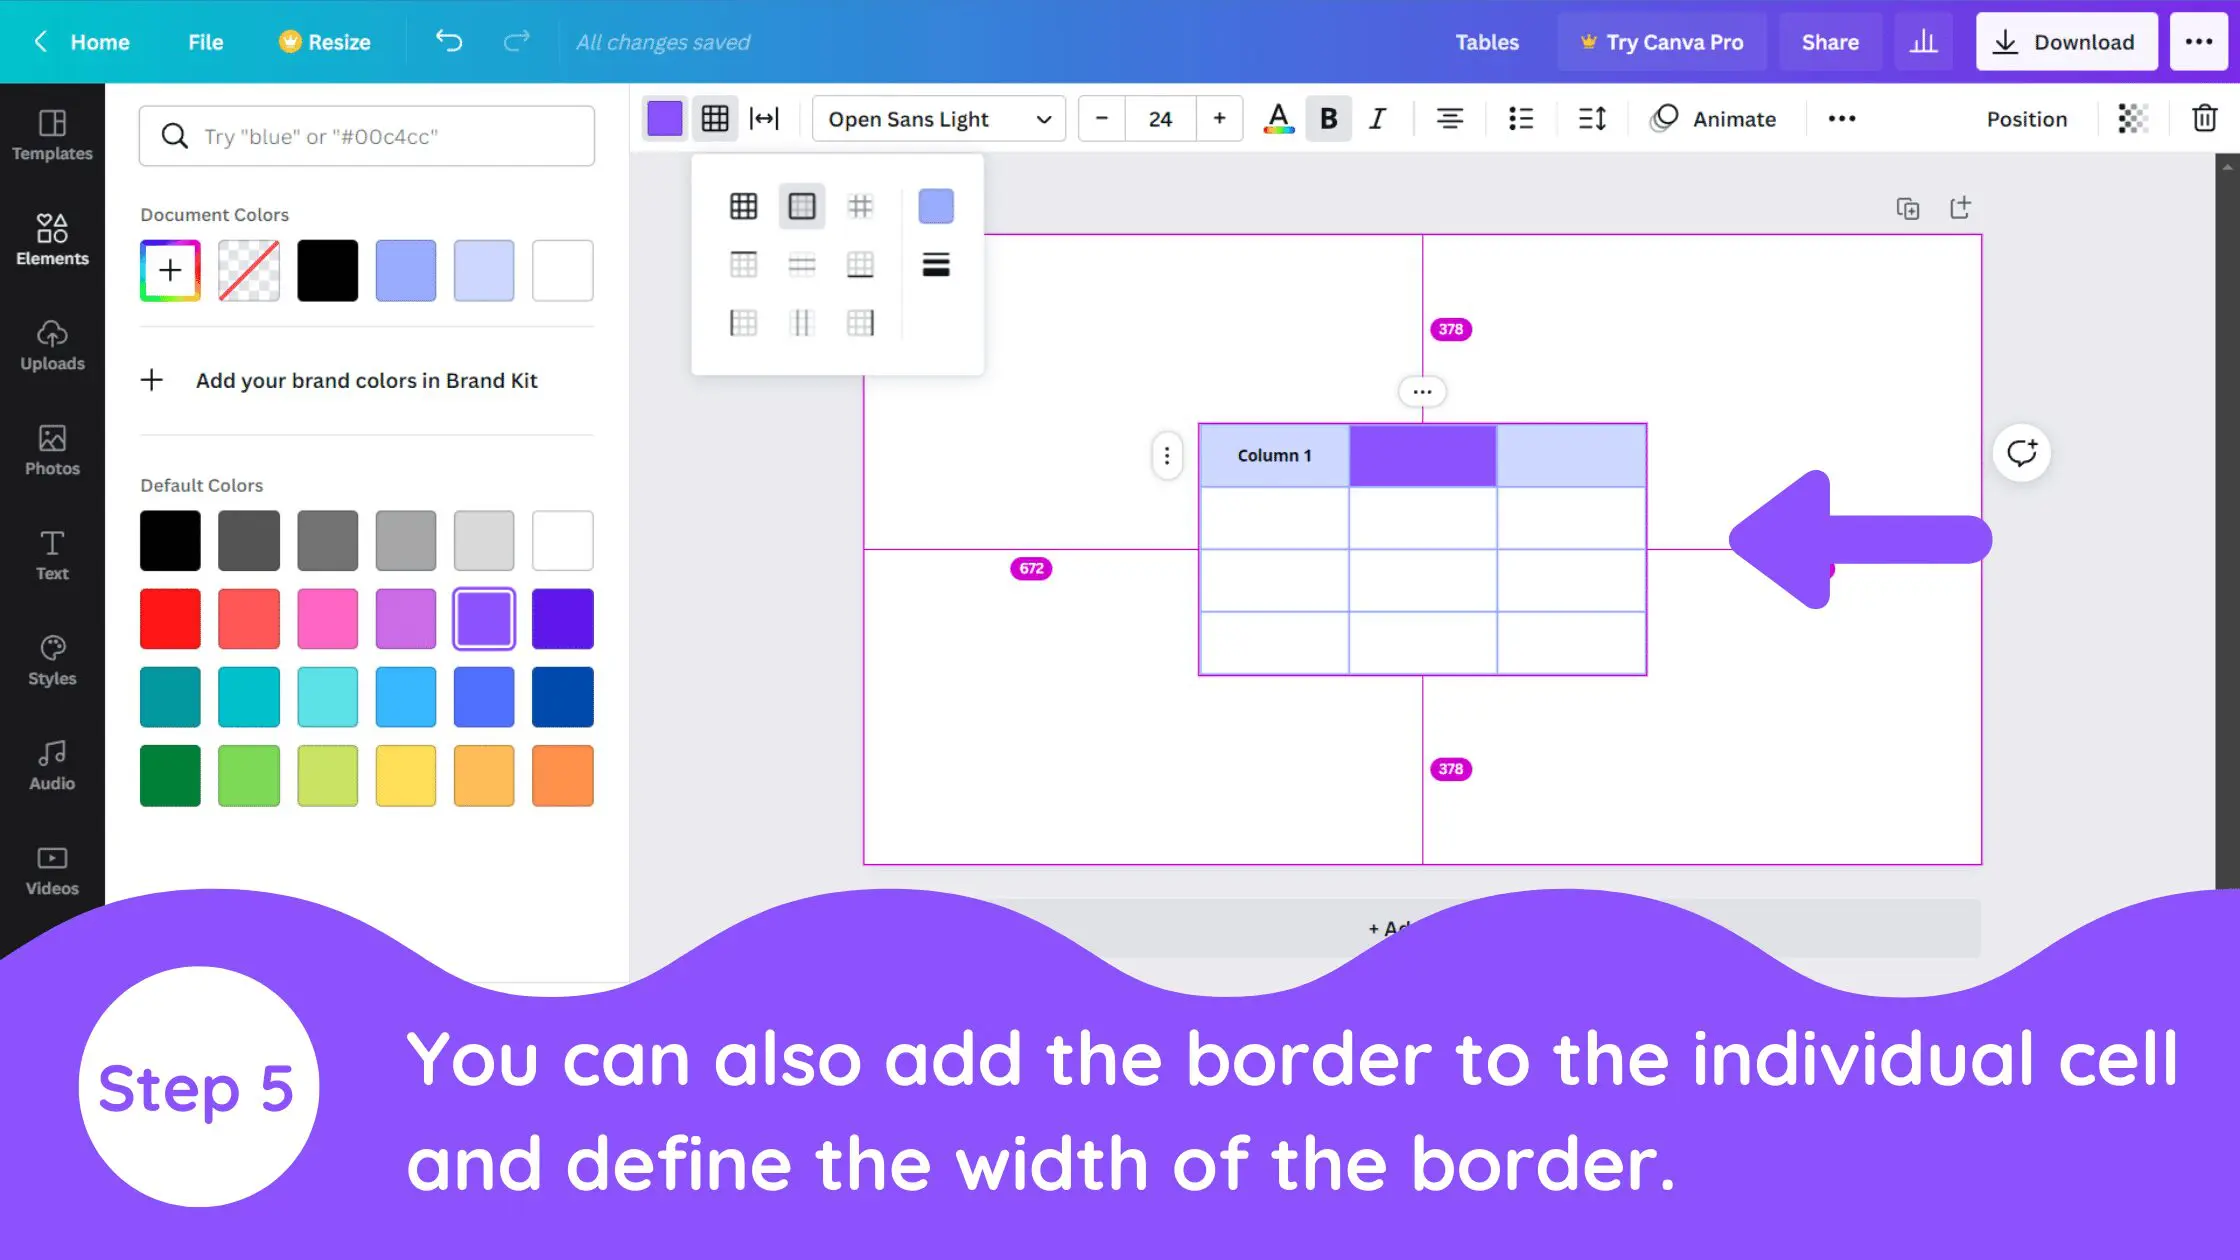
5. Define With and Border of Cells
If you want to highlight the cell, you can add the border around the cell. You can also define the width of the border.
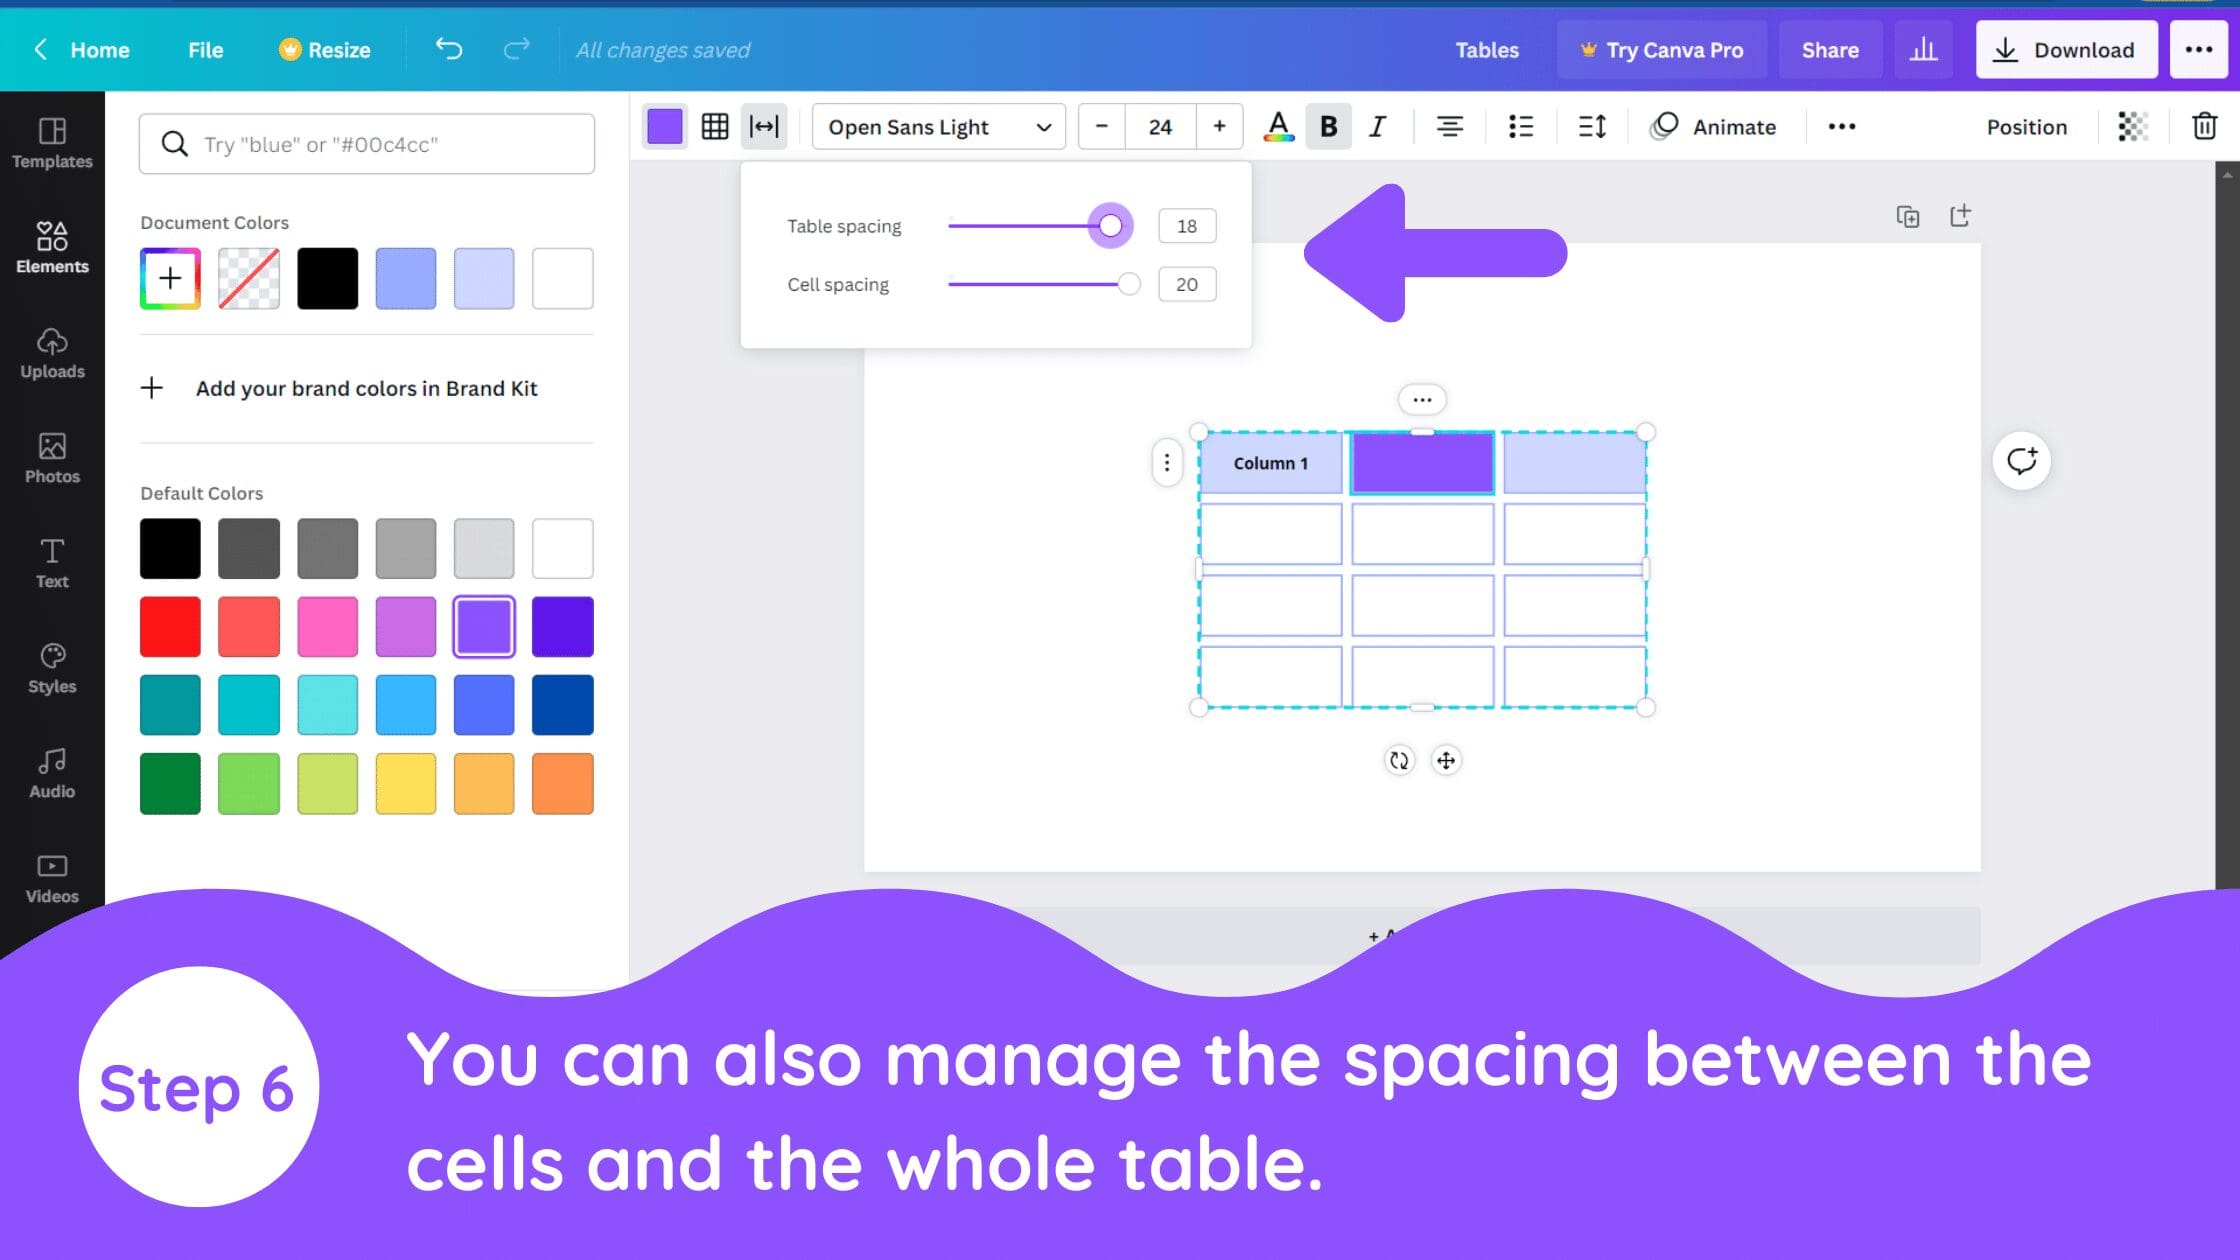
6. Adjust the Spacing Between Cells
Lastly, you can manage the spacing between the cells or the whole table as well.
Conclusion
Canva is an amazing graphic design tool, and I hope you found this tutorial covering how to create a in Canva, useful! Click here to read our comprehensive Canva Guide. If you haven’t tried CanvaPro, click here to try it for free for 30 days through our exclusive offer! Below are several related Canva tutorials that you might find useful.


