Disclosure: Some of the links below are affiliate links, meaning that at no additional cost to you, I will receive a commission if you click through and make a purchase. Read our full affiliate disclosure here.
Great graphic design is the secret super power behind many content creators. However, for many content creators, graphic design is either too time consuming to tackle or too expensive when outsourced to professional designers. Luckily, Canva has made creating your own custom designs much easier. In this tutorial, our team of design experts will cover how to create a dual color lighting effect in Canva.
How to Remove Video Background in Canva
1. Open a Canva Video Design
The first step in removing the background from a video in Canva is opening a new Canva design template. In order for this feature to be accessible you should select one of the pre formatted layouts under the Video tab. This can include any type of video template including Facebook Videos, Video Messages, Mobile Videos, or just a generic video template:
2. Add Video File to Your Canva Design
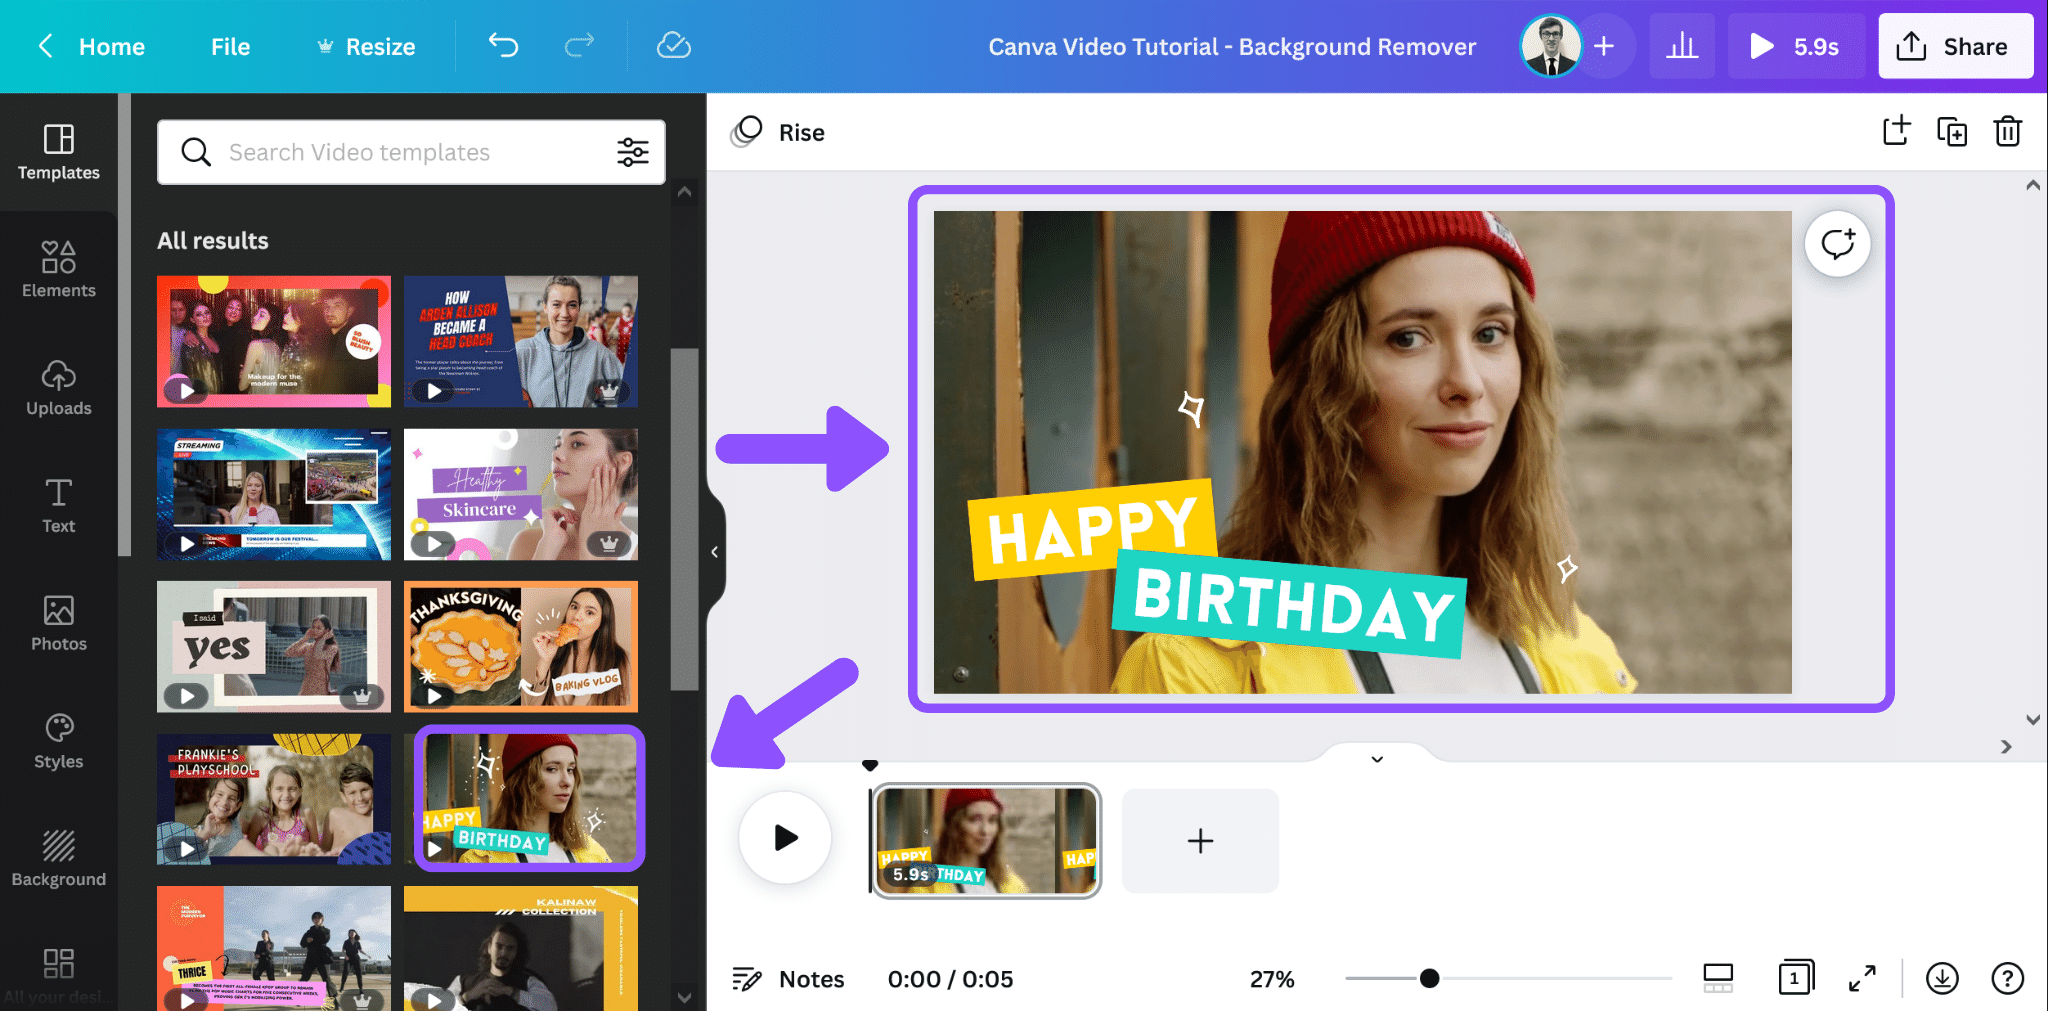
The next step is to add a video file to your Canva design. This can be a video clip that you upload to Canva or it can be one of the many video templates that appear in the left-hand menu.
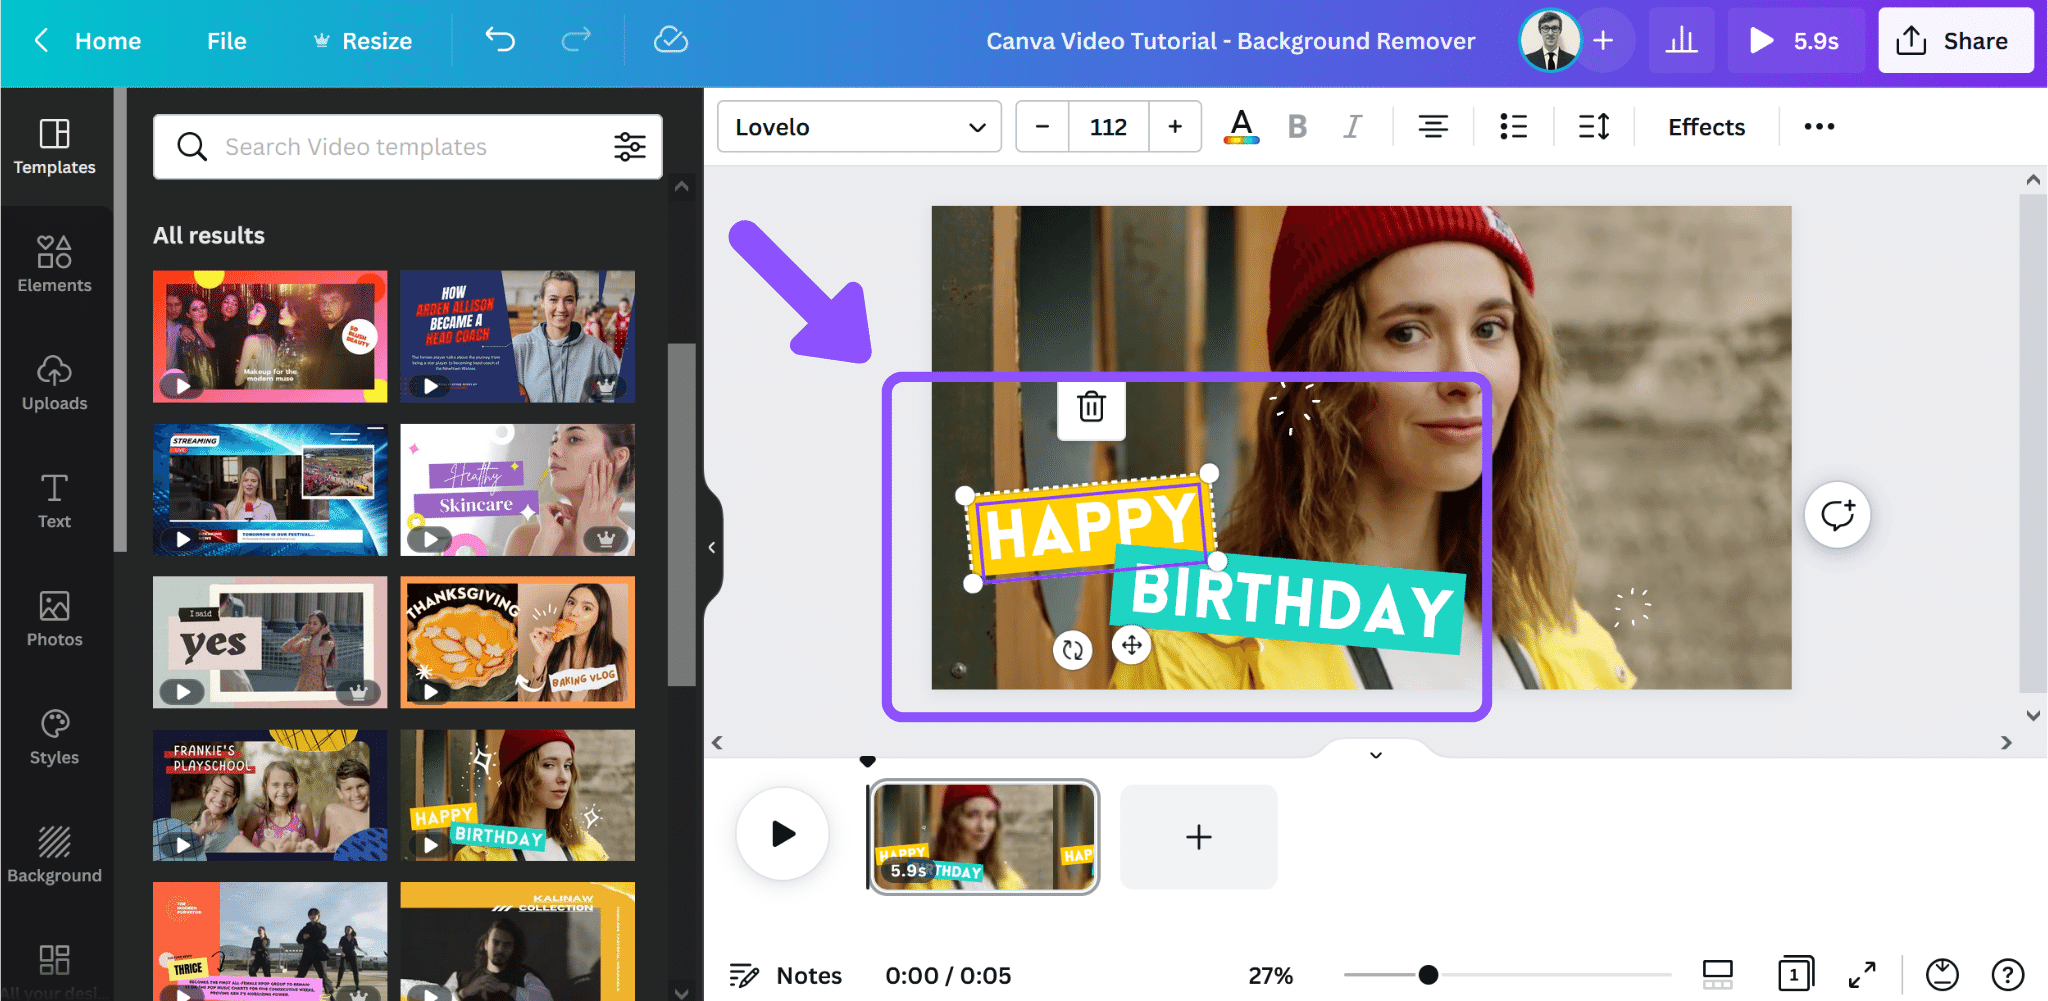
For the purposes of this example, I’ll select the Happy Birthday Template. Just click the template thumbnail once, and you’ll see the video template added to your Canva design.
3. Select the Video Element of Your Canva Design to Enable Video Editing Toolbar
Next, we need to enable to Canva video editing toolbar. Even though we’ve selected a video template, Canva needs to know which element within the template we are trying to edit.
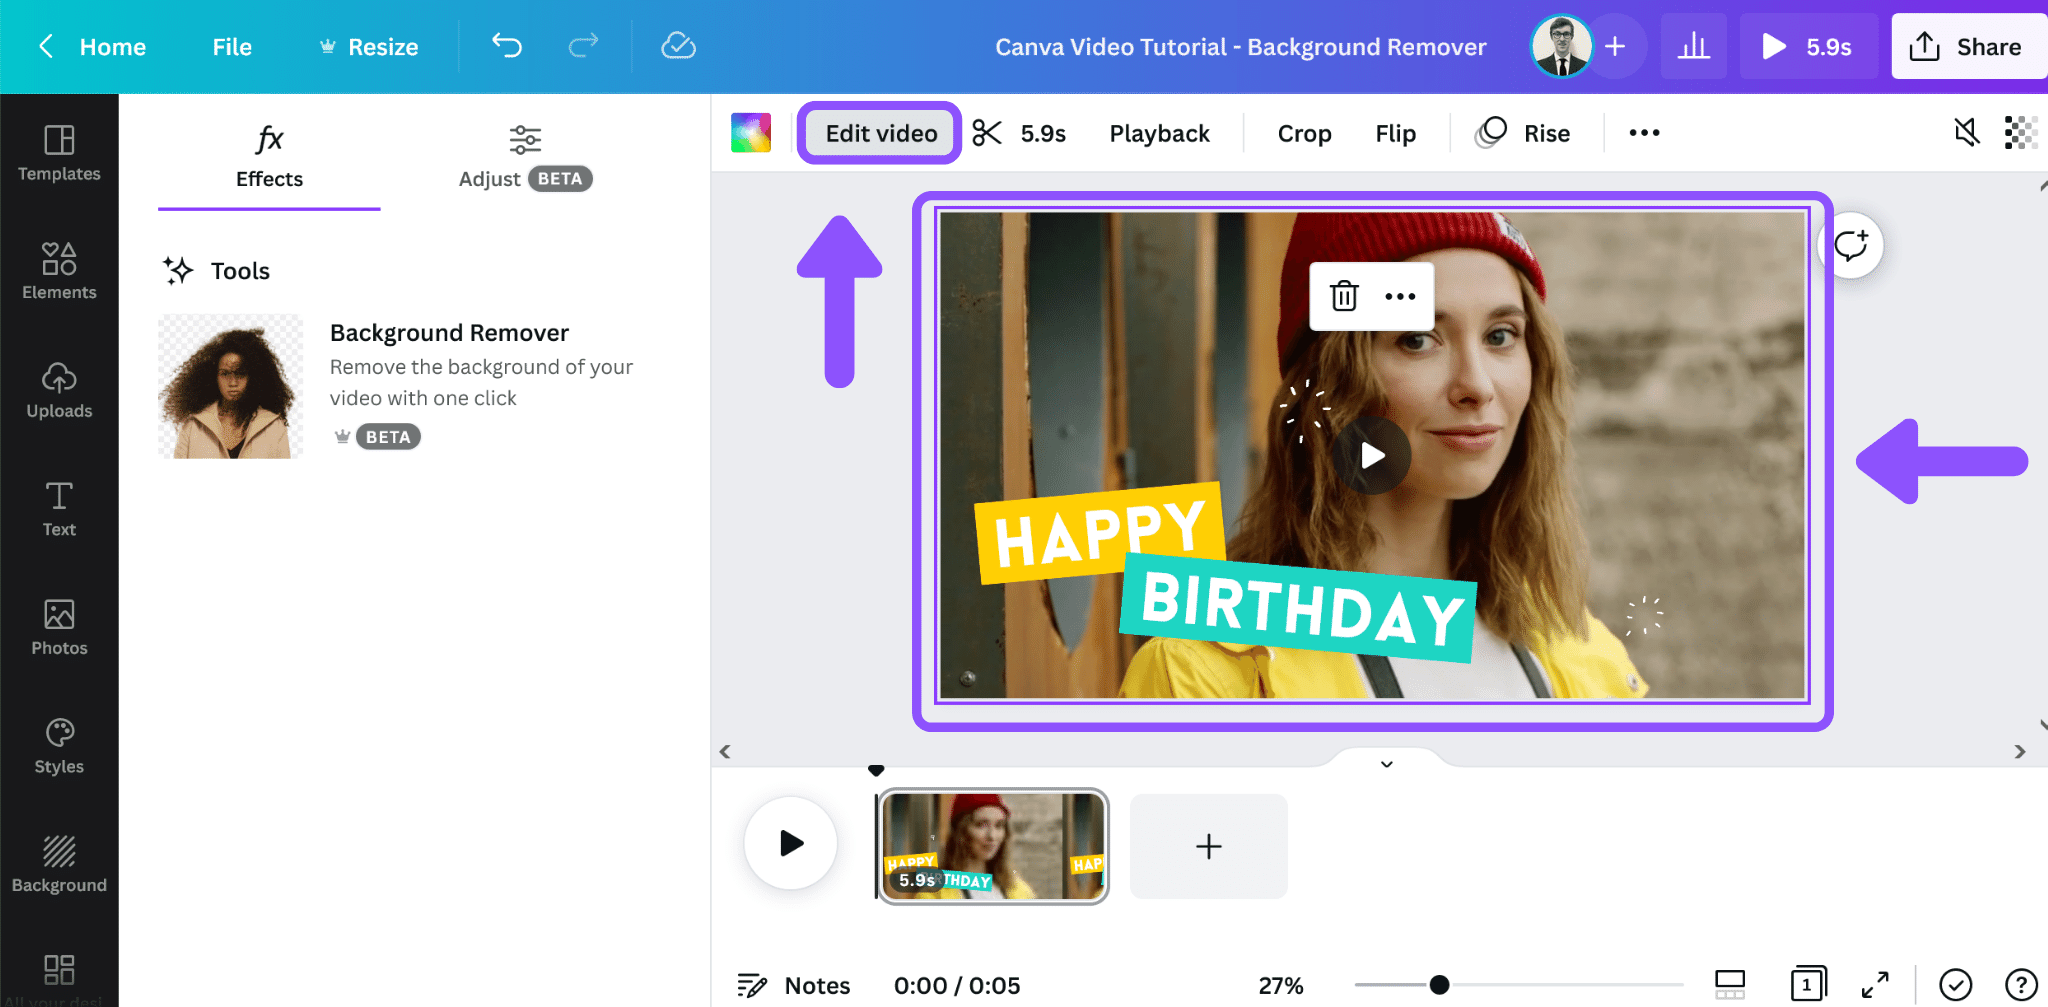
So click on the video element in your Canva design template. Using the template in this example, I just need to click anywhere on the video frame of the woman (with the exception of the Text Box and Star Elements).
When you successfully click on the video element, you will see an Edit Video button appear in the upper toolbar:
If you click on any other type of design element, this menu option will not appear. Using the template in this example, if I were to click on the Text Box, I’d see the following (notice how the Edit Video button does not appear):
4. Use Canva Video Background Remover Tool
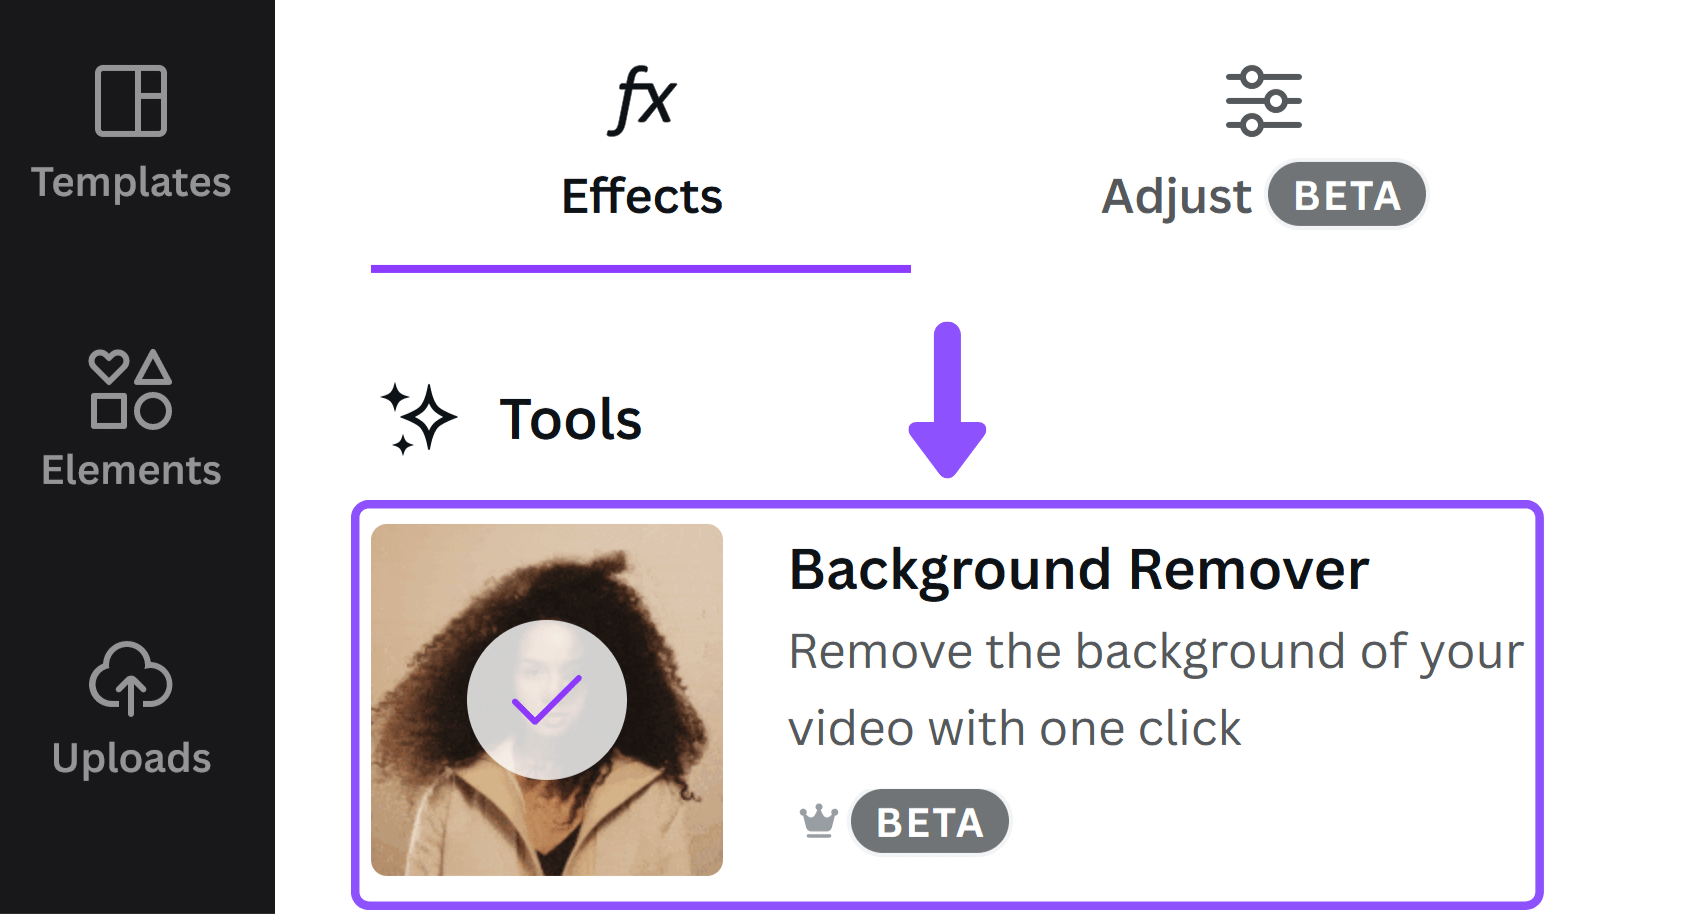
After clicking on the Edit Video button, you will see a menu containing the Canva Video Background Remover, appear on the left-hand side of your screen:
Simply click on this Background Remover button, and your video background will be removed. Keep in mind that video files are larger than image files, so it will take a few seconds to process the changes.
6. Finish Editing Video and Save
You have now successfully removed the background from your video! Keep in mind, that this is a new Canva tool, and much like the image background remover tool, it will take some time before the graphic design software will be able to perfectly crop out the background of a video. Still, it’s a very cool feature!
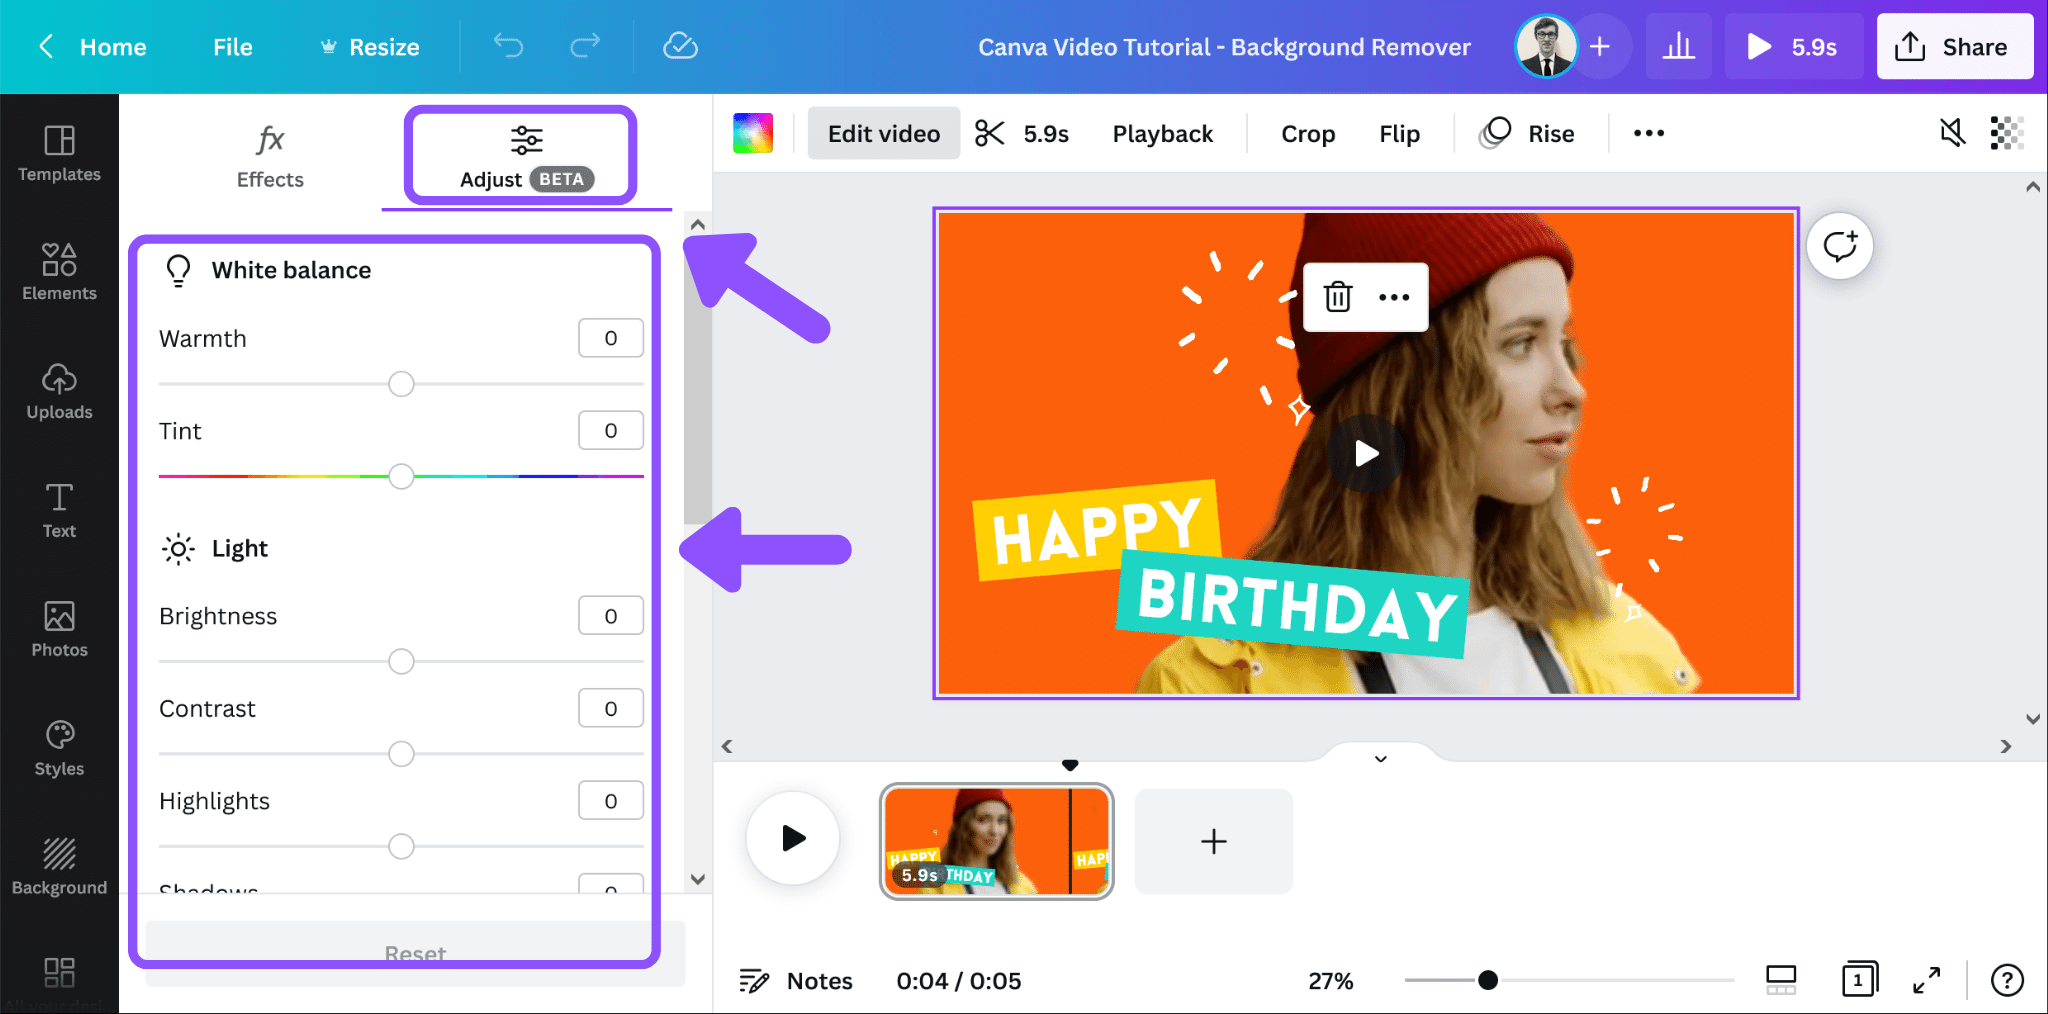
At this point you can Save your video file (if you are done) or you can click on the Adjust button, and adjust various settings relating to your video:
Sample Video Clip (Before and After Using Canva Video Remover)
As you can see, Canva’s Video Background Remover actually does a stunning job removing the background of this video! Even when overlayed on a bright orange background (extremely high contrast), there are few elements, other than the intended subject, that make it into the final video.
Conclusion
I hope you found this tutorial covering how to remove video background in Canva, useful! Click here to read our comprehensive Canva Guide. If you haven’t tried CanvaPro, click here to try it for free for 30 days through our exclusive offer! Below are several related Canva tutorials that you might find useful.


