How to Create a Blog with Notion

Written by Casey Botticello
Disclosure: Some of the links below are affiliate links, meaning that at no additional cost to you, I will receive a commission if you click through and make a purchase. Read our full affiliate disclosure here.
Looking to start a new blog? Having the right tools to manage every aspect of the blogging process can have a significant impact on whether the end result performs well or not. This guide will cover how to create a blog with Notion.
Popular blogging platforms such as WordPress, Medium, and Ghost are often among the first solutions people turn to. But did you know that Notion can play a huge role in the creation and launching of your blog?
The Notion platform has become a useful tool for all types of content creators and marketers looking to stay organized. Its developers have also been rolling out numerous features to expand its capabilities, including the recent launch of a public API.
How can you use Notion to build your blog? First, a brief overview of this nifty web solution.
What is Notion?
Notion is described as an “all-in-one workspace that helps individuals and teams, plan, collaborate, write, and organize content.” It is a comprehensive project management solution that combines a number of apps, tools, and resources. For example, you can use it to save notes, build databases, create content calendars, set reminders, write articles, or even run an entire business online.
Among the features liked by Notion users include the flexible nature of the platform. Many of its functionalities can be modified to meet a user’s individual needs.
You can easily share content, post comments and feedback, assign tasks, view changes in real-time, and much more.
There is also the possibility of using Notion to create and publish content to the web – literally in seconds.
All that is needed to launch a website on the platform is to turn on public access on a page and it will automatically be shared to the web.
As such, people have been building online portfolios, digital resumes, landing pages, pitch decks, and even company websites, just by using the tools offered by Notion. Since it already offers all the necessary components to plan, write, format, and publish content, it is easy to see how building a blog using Notion is also possible.
Why Create a Blog Using Notion?
You can handle every aspect of blogging from within Notion. In fact, it is as simple as writing the content and hitting publish. You don’t need extensive coding knowledge or highly technical tools to do anything, whether it is setting up your homepage, adding multimedia content, or designing your own blog templates.
Here are some of the things you can do with Notion as it relates to running a blog:
- Creating a blog dashboard: Notion allows you to create dashboards associated with any major project you want to work on, and you can do the same for your blog. This is where you will gather all the components that will contribute to the running, promotion, and maintenance of your blog, as well as enumerating all the things you will need.
- Mapping out and organizing your content creation process: You can use notion to plan your entire content creation workflow, from brainstorming and research to writing and publishing. On top of that, you can also organize your tasks using Kanban boards on Notion, which are similar to using Trello.
- Building a content calendar for your blog: In addition to organizing your blogging tasks, Notion has cool table building features that can be used to create a content calendar. You can even use the aforementioned Kanban boards to create your content calendar as well. A content calendar helps you to keep up with your blogging schedule, as well as related activities such as posting on social media.
- Writing and formatting blog posts: Yes, you can write the content of your blog post and format the body any way you like, all on Notion. One of the cool features of writing content on a Notion page is that you can use Markdown language to format the content, such as creating numbered or bulleted lists, making text bold, italic, underlined, etc. Markdown is simple to understand, so a complete novice can quickly grasp how to use it.
- Creating blog post templates: With Notion, it is possible to create templates for a variety of purposes, including setting up different blog post layouts. For example, you can have a template for “How-To” blog posts, one for listicles, another for checklists, and so on. Having templates around makes it easier to start writing each piece of content. You can start a new template and give it an appropriate name, add text areas, sections for images, etc. And just in case you are not sure what to write about or how to begin, there are numerous templates published by other people on Notion that you can use as inspiration.
- Publishing your content using Notion: The whole point of building a blog is to publish its content to your intended audience, and Notion allows you to do that too. In fact, you can publish your blog posts and other pages with a few clicks. We explain that step further down in the post.
Creating a Blog with Notion

Creating a blog using Notion, is easy, fast, and won’t cost anything for those using the free version.
What’s more, you don’t need to hire a web developer or possess any knowledge of coding to start a blog on the platform.
Everything you need is already available to you as a Notion user, you just need to put it together.
Here are the steps:
1. Write the Content

With Notion, it is easy to write a complete blog post, bio, affiliate disclosure or other web content from start to finish. To begin with, Notion offers sleek content-editing features that can match most word processing applications on the market.
You can start a new project from scratch and make any number of changes to the layout to get the type of blog design you are looking for. What do you want your blog’s homepage and posts to look like? There are a number of existing Notion blogs you can use as inspiration.
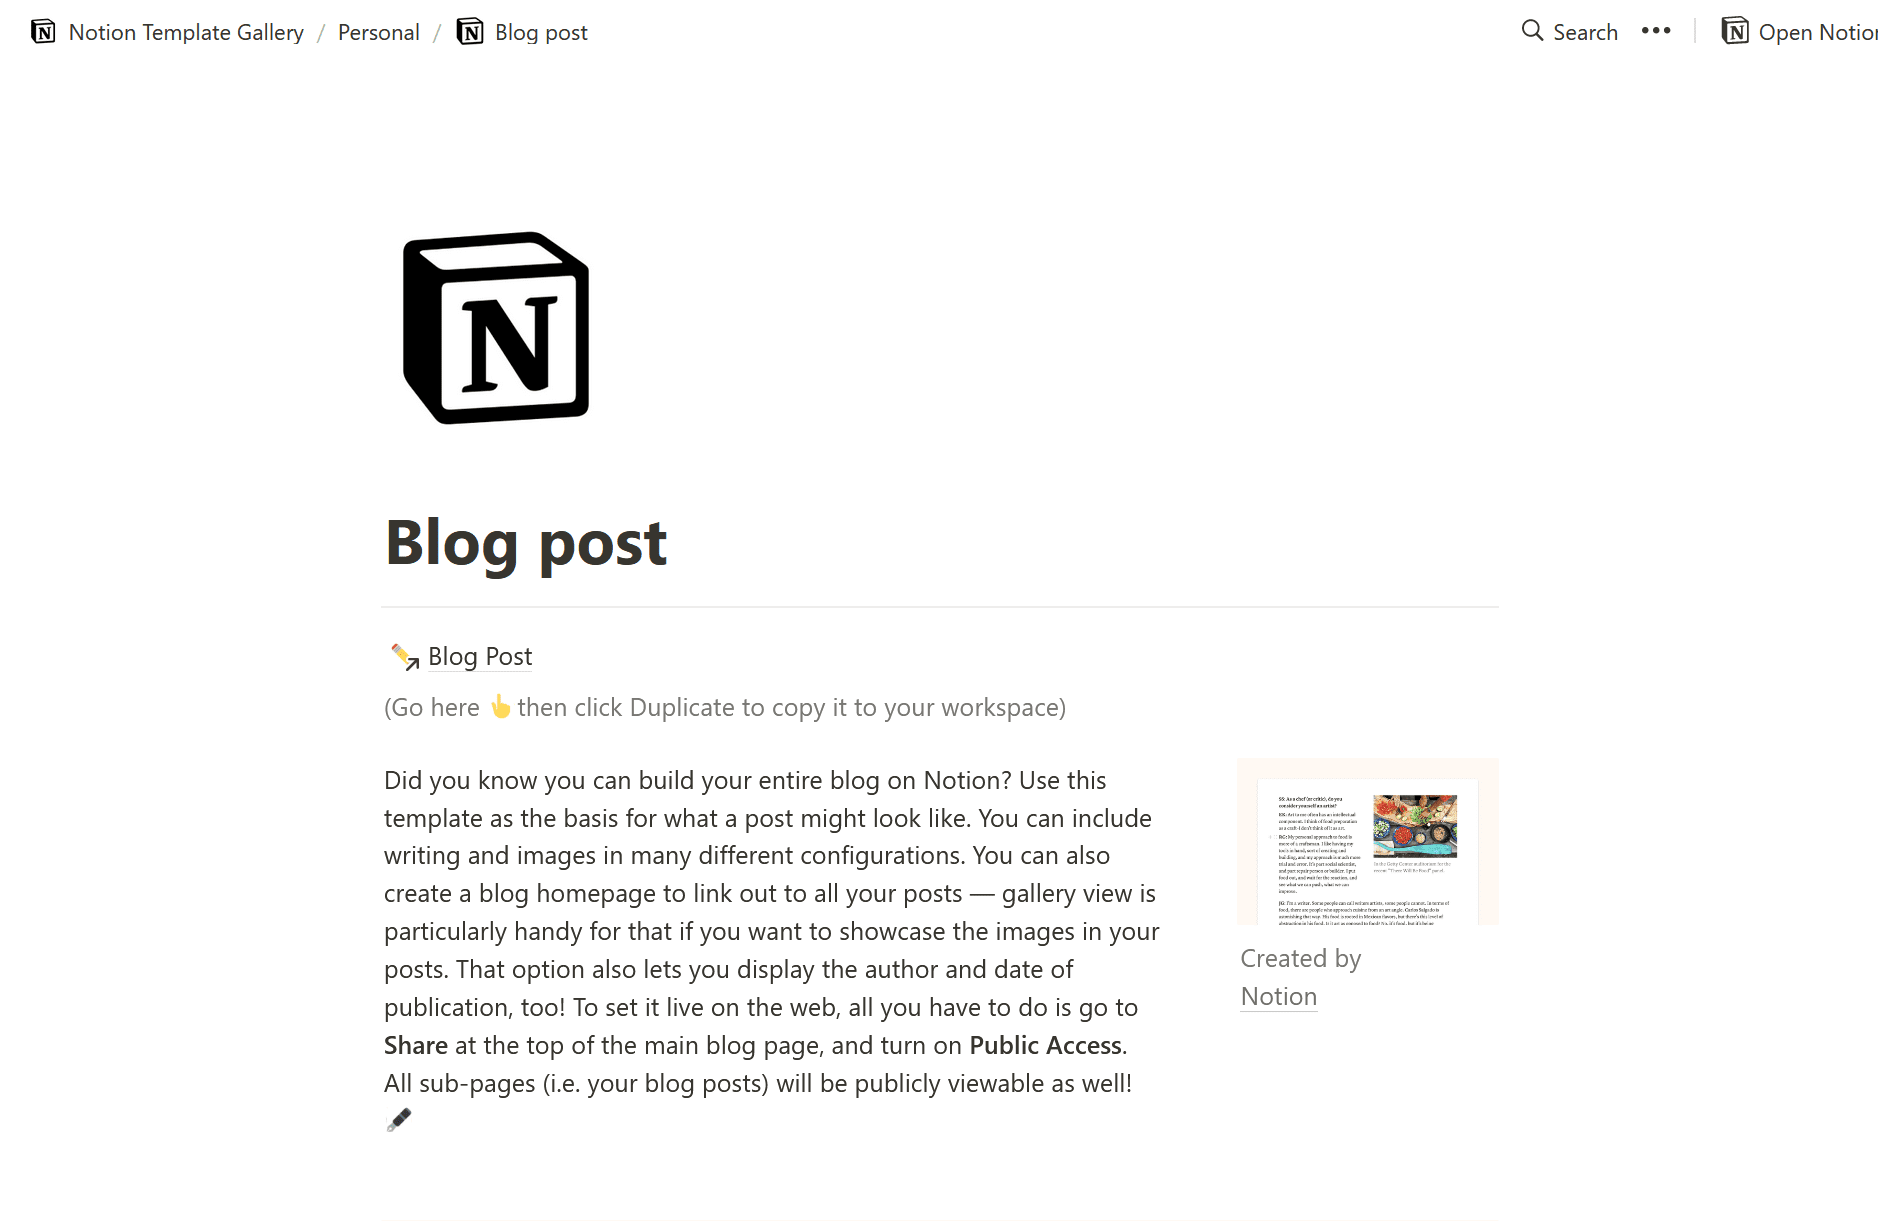
In addition, you can create your own templates as mentioned earlier, use Notion’s convenient blog post template, or templates made public by other Notion users, to write and format your content.
These templates are easy to modify, and Notion offers endless editing content configurations to suit the type of look and feel you are after.
For the blog template offered by Notion, all you have to do is search for it once you are logged in. You can then click on the “Duplicate” option to add it to your workspace and then get to work with creating your blog post.
2. Personalize Your Blog Content

There are literally millions of blogs available on the web, so you have to find ways to make yours stand out.
Notion provides a range of visual and structural elements you can use to create something simple or stunning, or anything in between.
You can easily upload images, gifs, videos, and more to your Notion workspace to be used in your blog posts.
Additional personalizing features include:
- Inserting columns that help to layout images and text in a professional way. Columns can easily be created by dragging content around, including text, images, other pages, etc. For example, you can set up your main blog page using columns that display all of your blog posts in a gallery view. Each time you write a new blog post, simply drag it here to be displayed in its own column.
- Breaking up text with headers and line breaks. You can segment your page content with various headers (H1, H2, H3, etc.). You can also create line breaks that separate long pieces of text by typing three consecutive dashes.
- Adding multimedia content to make your post more interesting. You can add all types of raw videos, embed YouTube videos, images, podcast files, and other types of multimedia content to your blog pages. You can also choose different fonts, backgrounds, text sizes, header images, insert your social media handles and hypertext links, and more, to suit your brand. Just in case you are in search of beautiful stock images, Notion’s partnership with Unsplash means you can have access to over two million images for free to use on your blog.
- Inserting a table of contents. In the event that you are writing a long article, course, or guide on your notion blog, you can use the table of contents feature to make the content searchable. This is possible using the “/toc” command, which will automatically use the headers in the document as list entries for each section.
- Encouraging feedback from your audience. Just in case you want people to share their views on a particular topic, you can embed and configure a Typeform in your Notion blog page. This will make it possible for readers to give an opinion (such as for a poll or survey), leave reviews, or provide general feedback on your blog. You can even use the Typeform as a point of contact if you would like readers to get in touch.
3. Publishing Your Post Online

Once you are satisfied with your blog post, it is time to share it online. As mentioned earlier, publishing a document to the web using Notion takes only a few clicks, and you can do it yourself.
Any changes made to the content on Notion will be reflected in real time on the published page.
To publish any page, click on the “Share” option at the top. From the resulting menu, click on “Share to the web” to make it public.
Note that any sub-page linked to your blog will also become accessible unless you have configured individual page permissions to keep them private.
Having opted to share a blog page with the web, anyone with the link will be able to view your post, as well as any linked pages.
You will be able to copy a link that you can share in a number of ways, including on social media platforms, through email, or even text messages.
In addition, you can invite your contacts to view the content, and even leave comments.
The “Allow duplicate as template” feature is automatically turned on when you share a page publicly on Notion. Keeping this on will allow anyone who has the link to duplicate the page as a template for themselves.
This is how you are able to find other templates published by other Notion users. If you don’t want your post to be available as a template, you can turn off the feature.
There is also the option to turn on search engine indexing, which will make your blog posts visible on Google and other search engines.
This can be a great feature if you are looking to increase traffic for monetization purposes. However, the search engine indexing option is only available to Notion’s paying subscribers.
By default, your blog’s public URL will be in the format yourdomain.notion.site. However, in the event that you want to host your blog elsewhere, but still use Notion to create and format your content, there are numerous articles online explaining how to connect your published Notion content to a domain of your choice, as well as add custom scripts and styles.
There are even articles on how to use the Notion API to set up and run a blog, but these options often require some amount of technical knowledge.
Conclusion
There are a lot of moving parts associated with building a blog from scratch. From curating and organizing content ideas to writing blog posts, taking care of graphic design, formatting, domain hosting, content management, and more, it can all command a lot of time and energy.
Fortunately, you can simplify much of the hassle of building and maintaining a blog by using Notion. I hope you found this guide to how to create a blog with Notion, useful! And if you are looking for a blogging platforms with more functionality, there are a number of other blogging platforms for bloggers to choose from.
