How to Upload Audio or Music to Canva

Written by Casey Botticello
Disclosure: Some of the links below are affiliate links, meaning that at no additional cost to you, I will receive a commission if you click through and make a purchase. For more information, read our full affiliate disclosure here.
Adding audio or music to your presentations or YouTube videos is crucial for content creators. One of the most commonly used graphic design platforms used by YouTube creators is Canva. This article will explore how to add audio or music to Canva.
How to Add Audio or Music to Canva
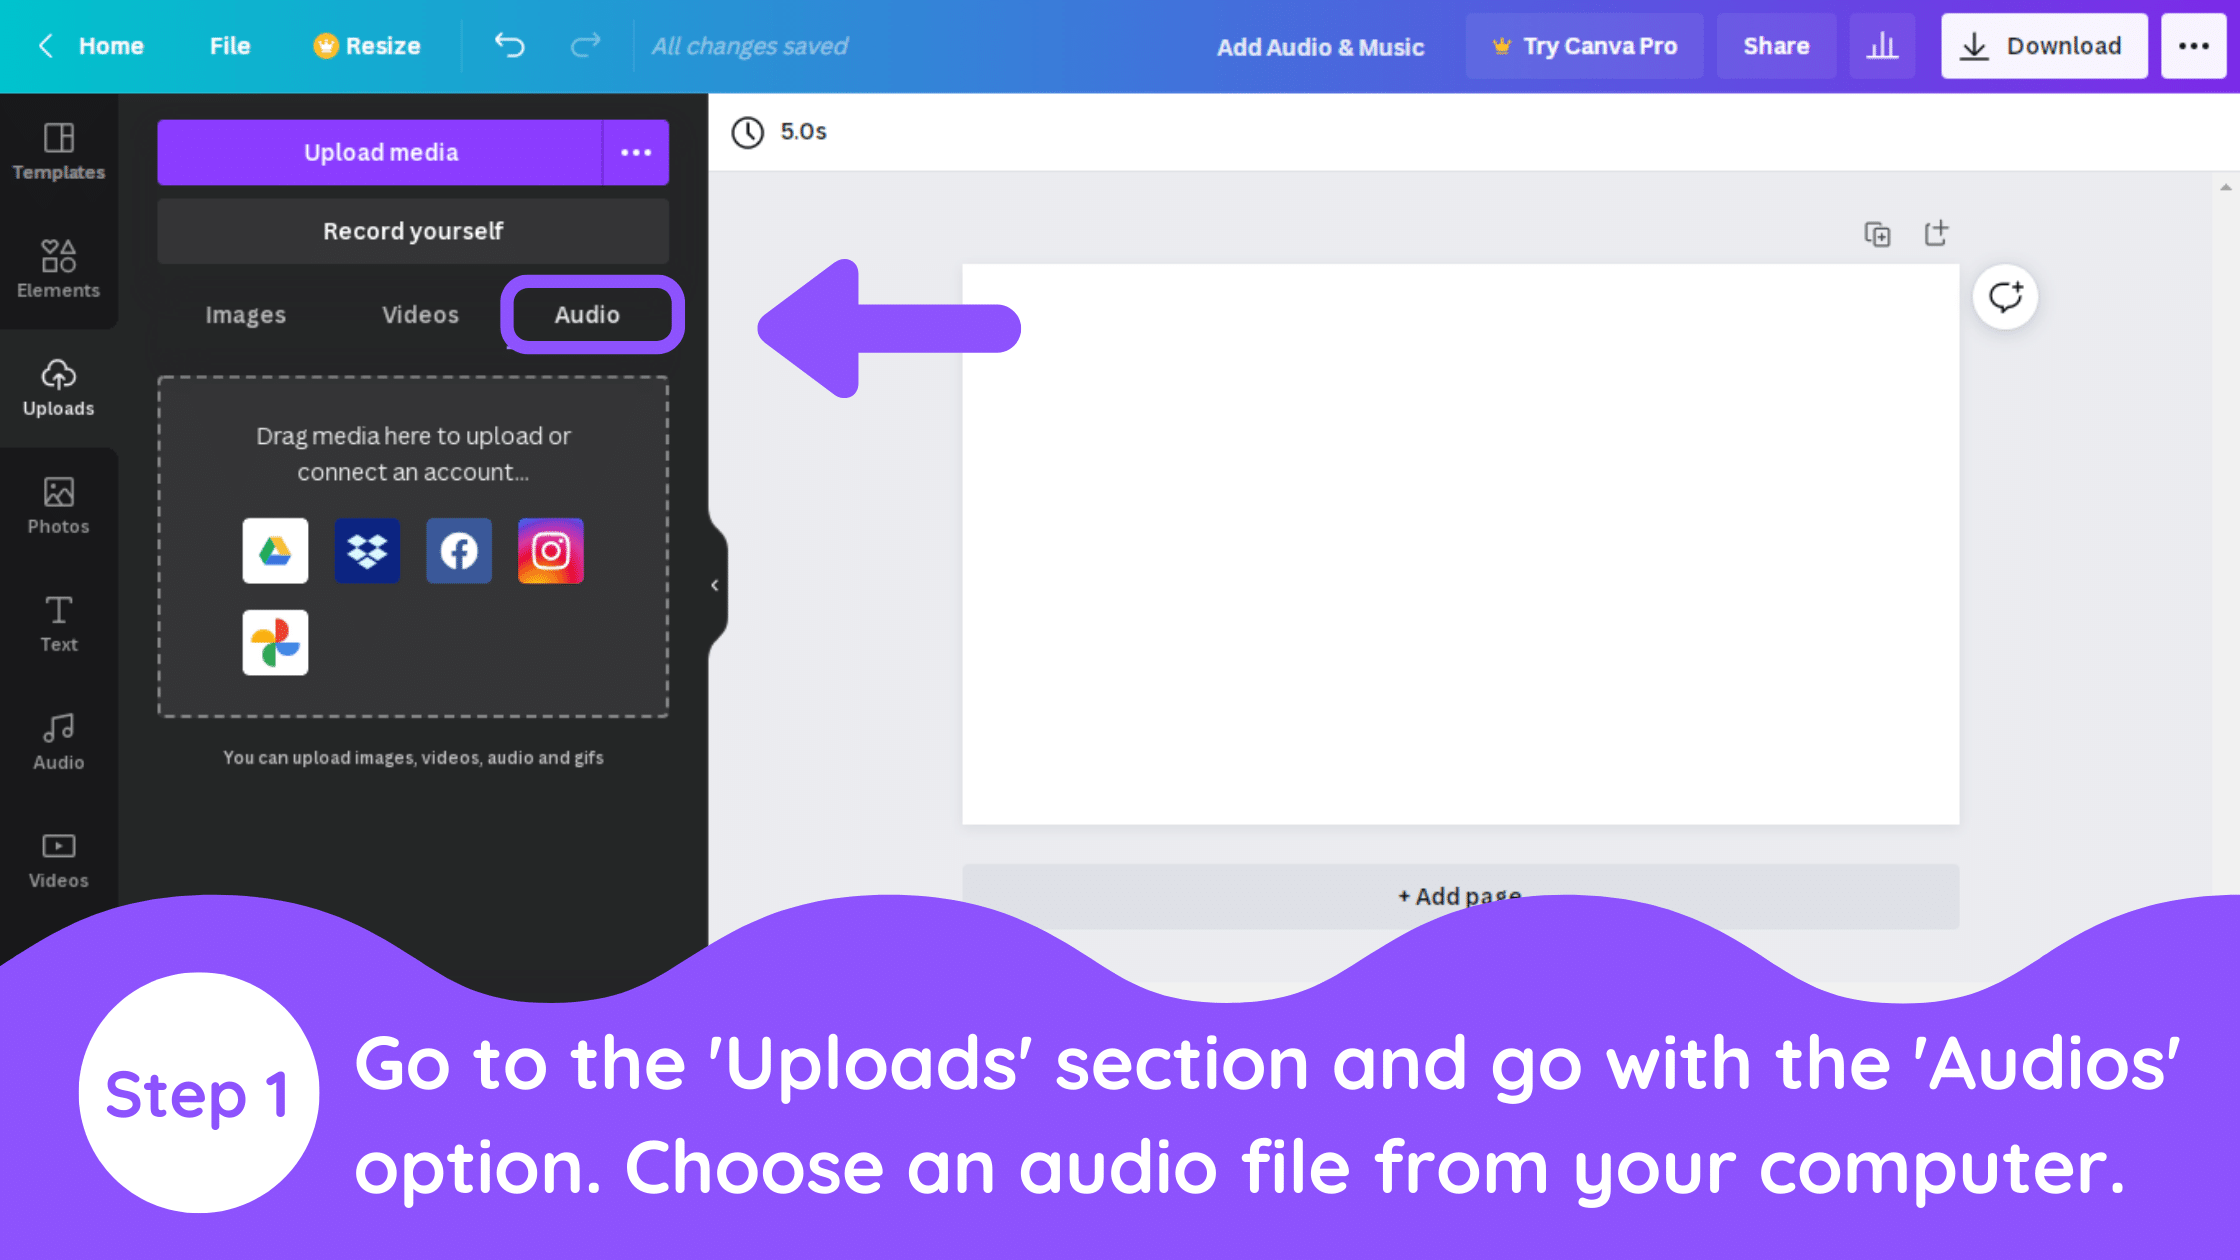
1. Upload Audio to Canva
Go to your Canva Design and go to the ‘Uploads’ option. You can see different options. You need to choose the Audio option and click on the ‘Upload Media’ button. You can upload any audio files that you want to add to your designs.
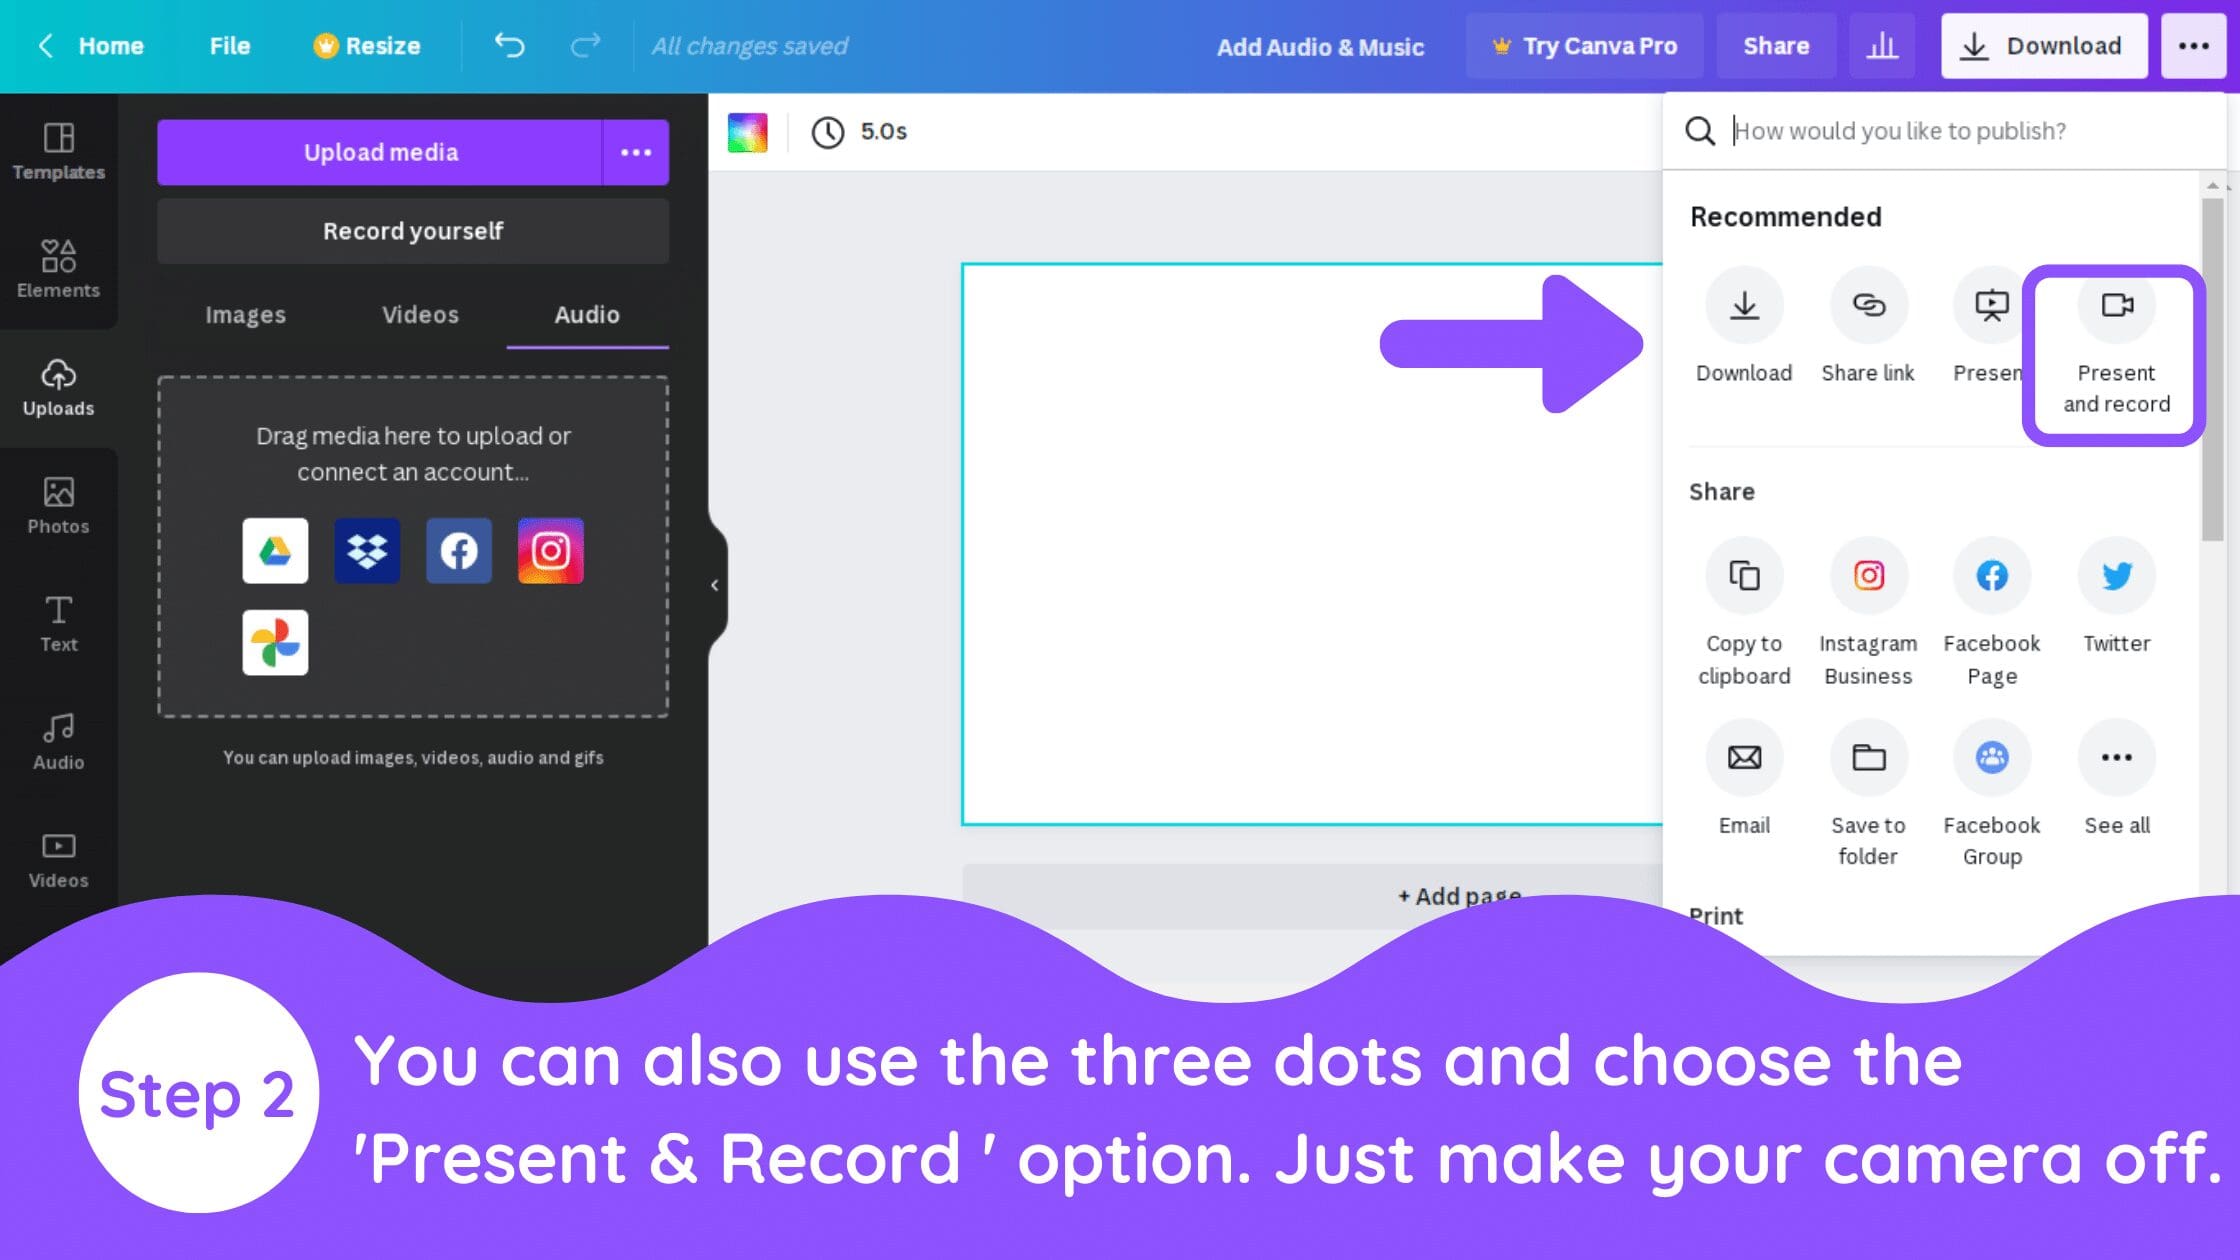
2. Record Your Own Audio
If you want to record your voice in real-time while designing, you can go to the three dots on the right side of your design and choose the ‘Presentation & Record’ option. All you need to do is make your camera off and record your voice. After saving your audio, it will get automatically uploaded to your Canva Audios.
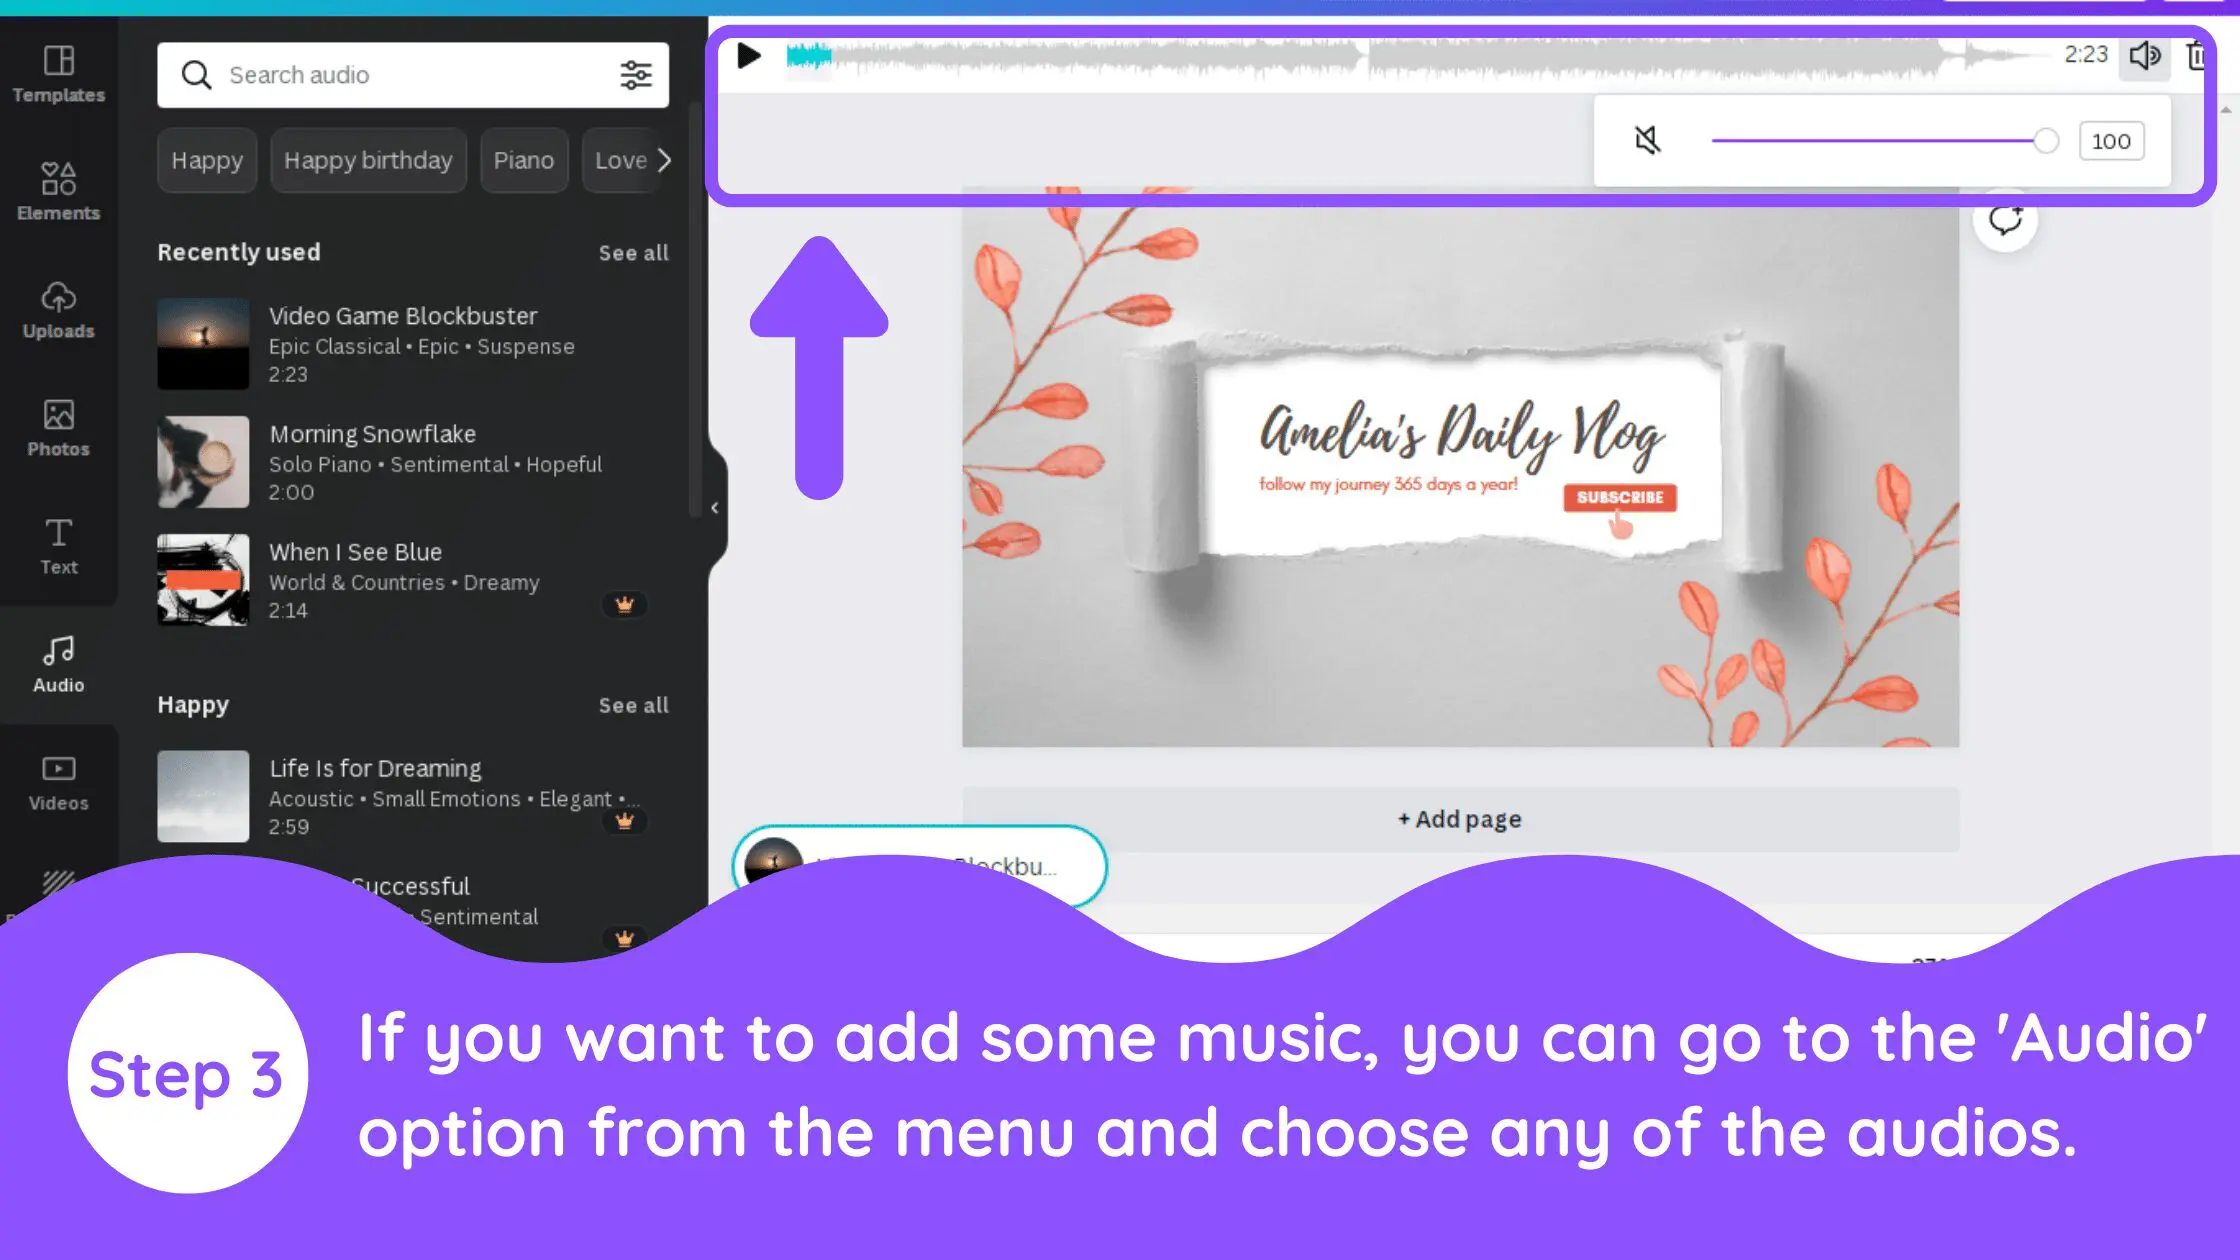
3. Add Additional Music or Audio From Canva’s Stock Audio Library
If you want to add audio tracks just within your Canva Free Audios, all you need to do is go to the ‘Audios’ from the left side menu and choose any of the audios. You can also manage the audio timings as well as the volume of the audio.
Conclusion
There you have it! I hope you found this tutorial on how to add audio or music to Canva, useful! If you want more inspiration, why not check out our other articles on Canva fonts and Canva tutorials.
Canva is an amazing graphic design tool, and I hope you found this tutorial useful! If you are interested in trying Canva Pro for free, click here. Below are several related Canva articles, tutorials, and guides that you might find useful.


