How to Add Gold Foil Lettering to Canva

Written by Casey Botticello
Disclosure: Some of the links below are affiliate links, meaning that at no additional cost to you, I will receive a commission if you click through and make a purchase. For more information, read our full affiliate disclosure here.
One of the most popular style trends across digital marketing content on social media is the use of gold foil lettering (AKA gold foil text). Gold foil lettering can be achieved through several methods, but for the purposes of this example we will use the same basic steps involved in text masking in Canva. This article will cover how to add gold foil lettering to Canva.
Additionally, I’ve included several free gold foil background textures, which you can download and use for your own text!
Before you go through the steps in this tutorial, be sure to download these gold foil background patterns and upload them to your Canva account!








Steps to Create a Text Mask in Canva
1. Search for The Letters for Your Text Mask
The first step in creating a text mask in Canva is finding and choosing the letters for your text mask.
But how do you find these letters?
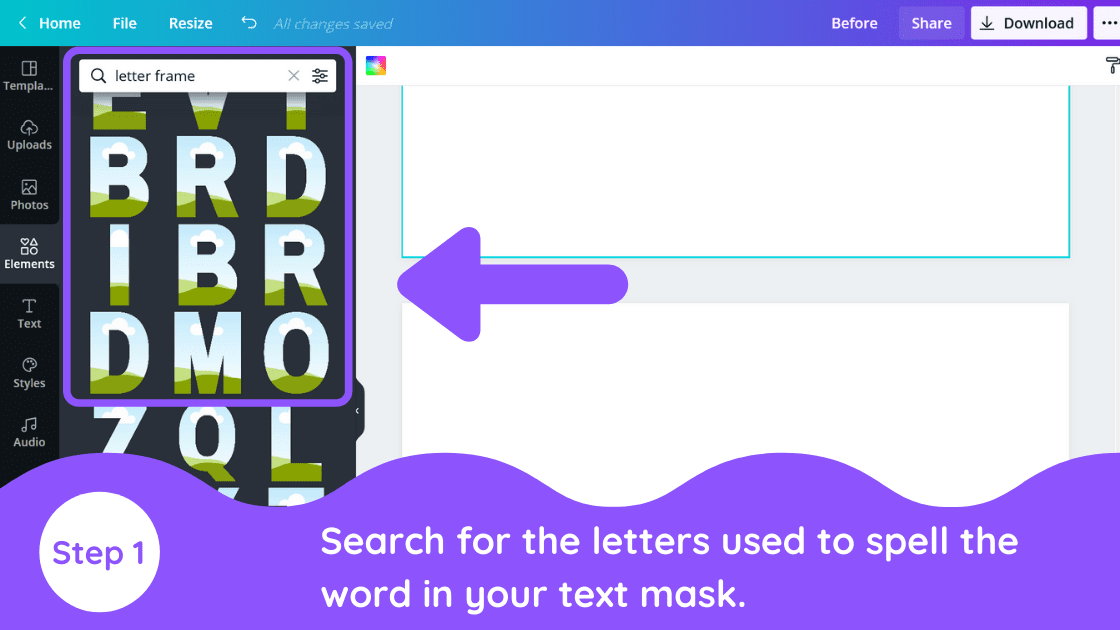
First, click on the Elements tab, and search for the term: “letter frame“
You may need to scroll down a bit to reach the style of letter frames featured in this article.
Alternatively, you can search for the phrase “letter X frame” (substituting your desired letter for the X). For example, if you search for “letter G frame” you will see the style of letter G frames that will be used in this article:
2. Select and Position Your Letters
Next, select the letters needed to spell your word. For this example, select the four letters that spell the word GOLD (G, O, L, D).
3. Drag Images Into Letter Frames
Next, you will need to drag the desired images over the letter frames. There are a few things to note during this step:
1. When dragging an image from the “uploads” tab on your Canva sidebar, make sure that you drag the image directly over the letter before releasing your left click on your mouse. Otherwise the photo may be set as the page background.
2. You can use one photo for each letter or you can select 3 unique images (one for each letter).
3. Make sure you successfully drag and drop your photo into the letter frame before attempting to resize it.
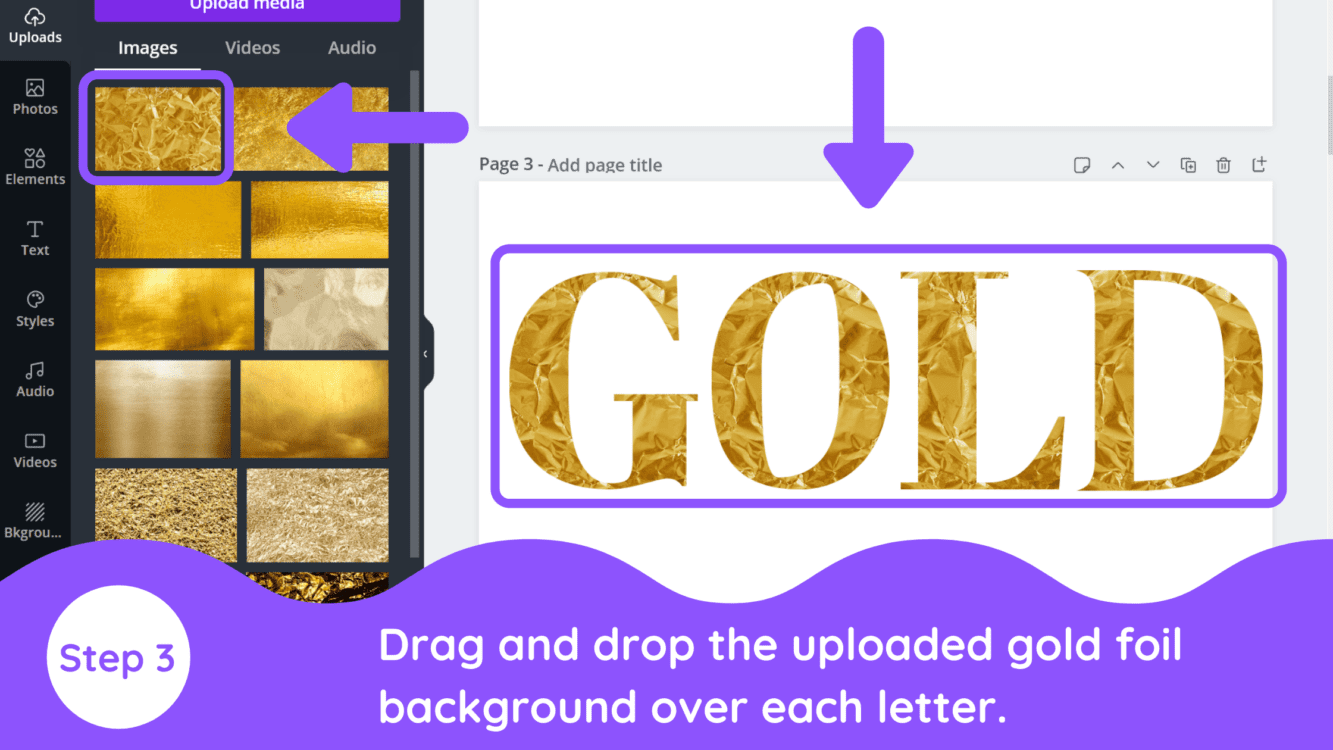
If you haven’t already done so, return to the top of the article and download one of the 9 gold backgrounds and upload it to your Canva account.
Next, select the gold foil gradient image, and drag it over each letter:
Conclusion
Canva is an amazing graphic design tool, and I hope you found this tutorial on how to add gold foil lettering to Canva useful! Click here to read our comprehensive Canva Guide. If you are interested in downloading Canva or trying Canva Pro for free, click here. Below are several related Canva tutorials that you might find useful:

