How to Create a Sliced Text Effect in Canva

Written by Casey Botticello
Disclosure: Some of the links below are affiliate links, meaning that at no additional cost to you, I will receive a commission if you click through and make a purchase. For more information, read our full affiliate disclosure here.
Canva is a cool tool that can help you create amazing images and edited graphics. Not just that, you can also create amazing text effects using Canva. In this tutorial, we will show you how to create a sliced text effect in Canva.
How to Create a Sliced Text Effect in Canva
1. Add the Letters to Your Design
Go to the ‘Element’ section from the left menu and search for the alphabets you want to have this effect on. For the purposes of this Canva tutorial, we are using the word “Sliced” as as our sample text.
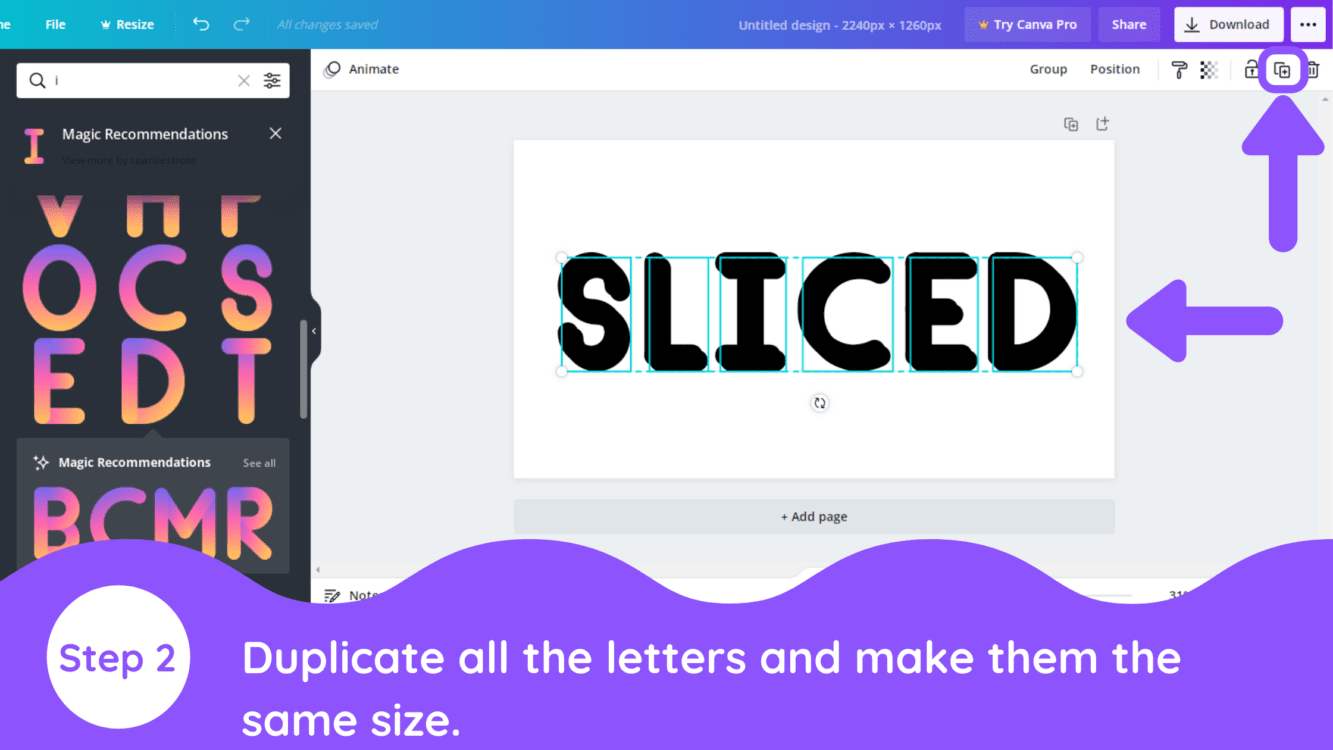
2. Duplicate Each Letter
Align the text as you want and duplicate the text.
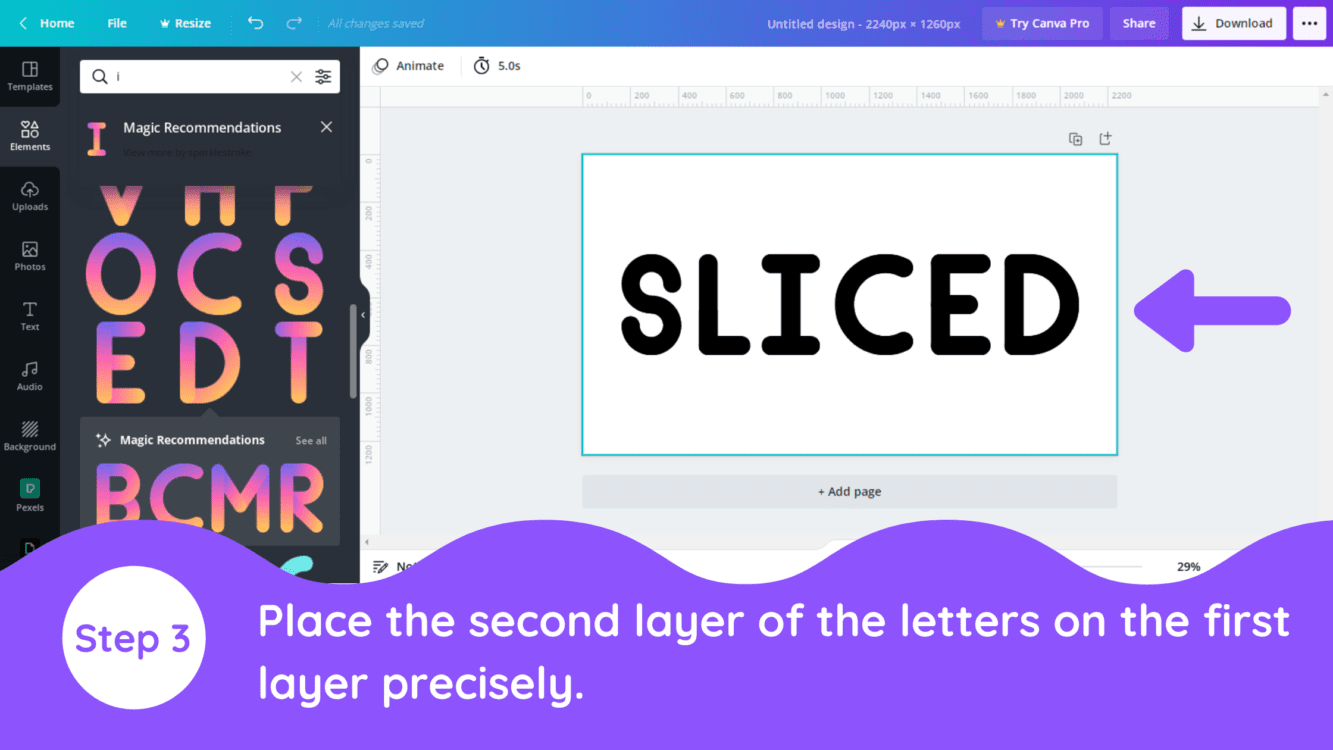
3. Align the Letters on Top of Each Other
Place it over the original text and make it a layer.
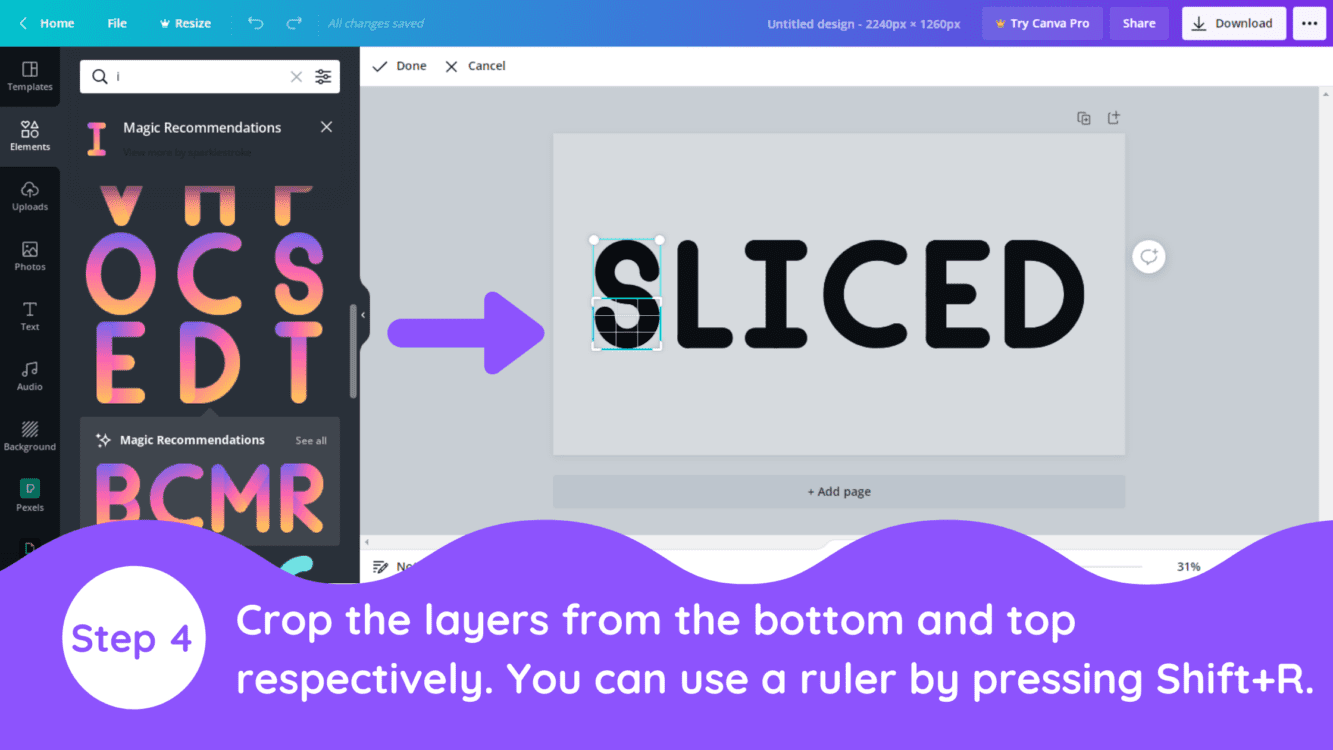
4. Crop the Letters on the Top Layer
Now crop the text letters from top to the half and do the same with the underlayer by cropping them from the bottom half. To avoid conflicts in the size of the cropped alphabets, use Shft+R to get the ruler.
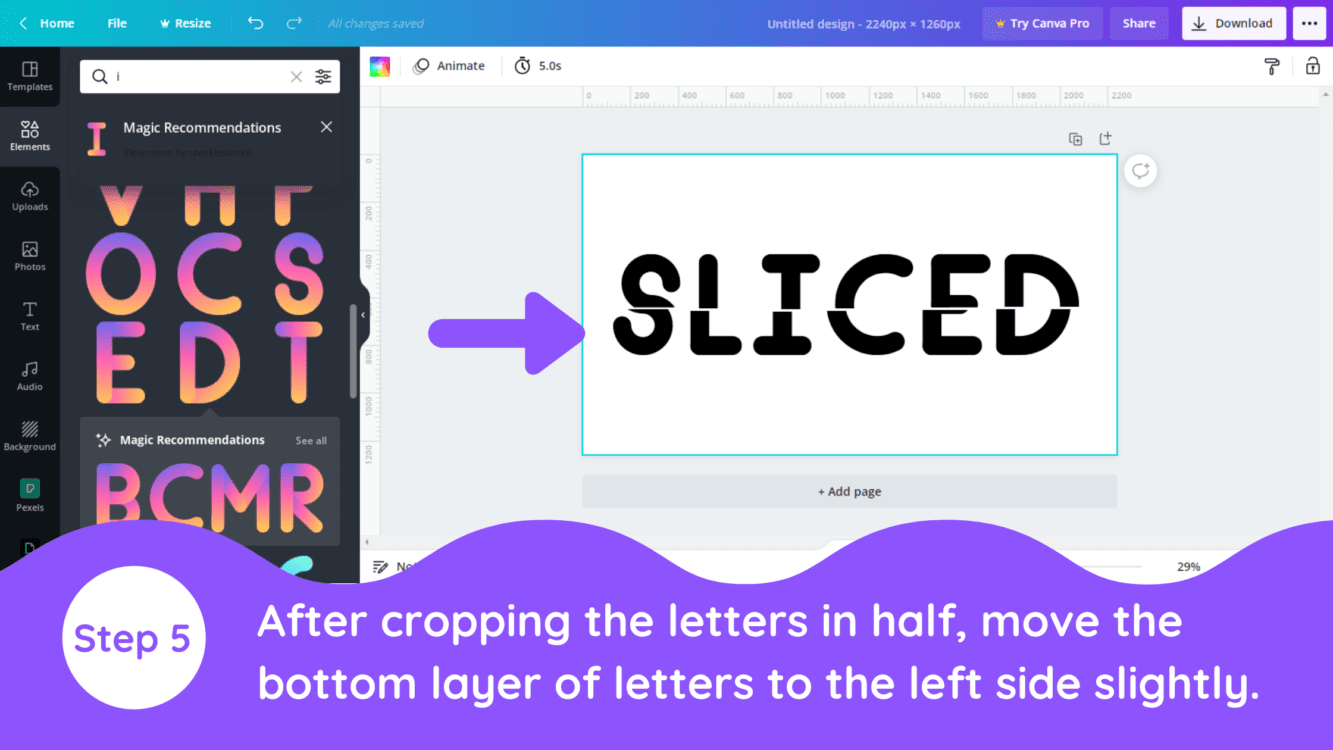
5. Move Bottom Layer of Letters Slightly to the Left
After getting all the letters cropped precisely, select all the bottom letters and move them slightly to the left side. It will give you a cut effect.
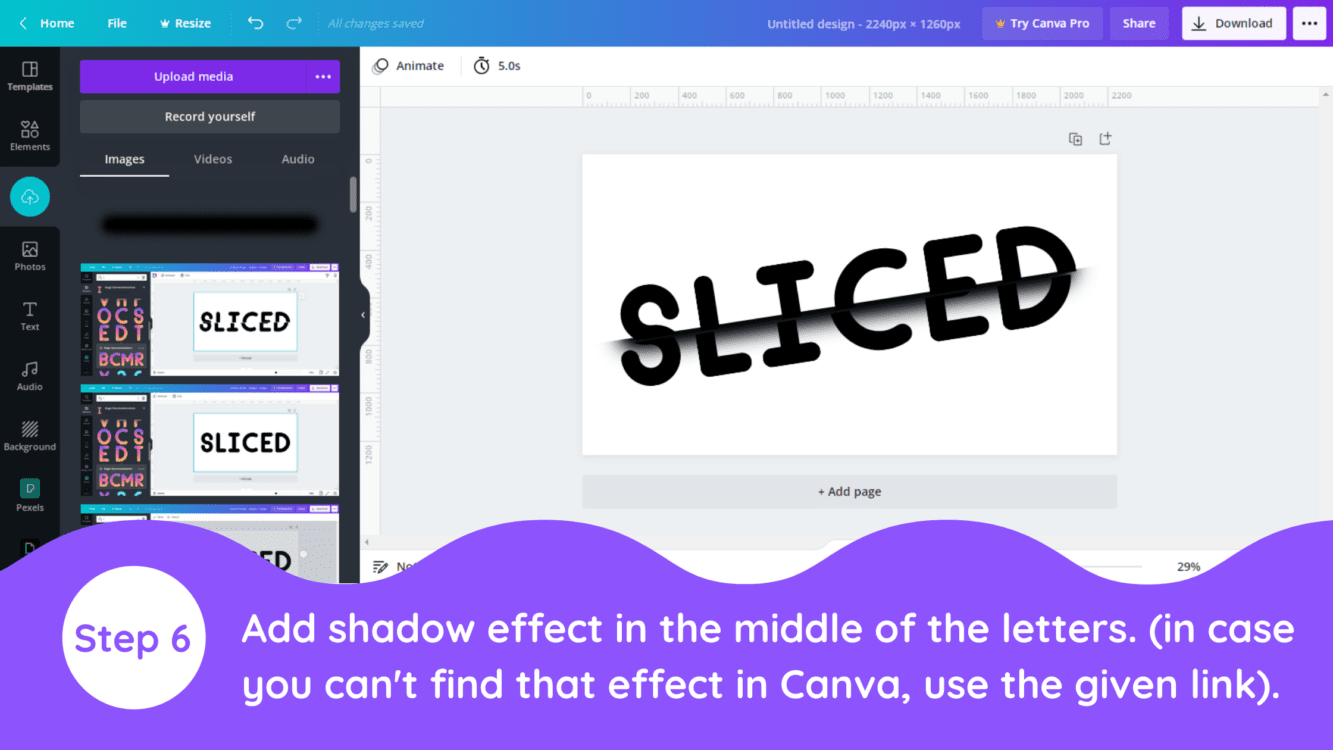
6. Add a Shadow Effect
Once the color picker in Canva is clicked on, you will see a magnifying glass appear wherever you drag your cursor. This magnified view allows you to select the precise color that you want.
Conclusion
Canva is an amazing graphic design tool, and I hope you found this tutorial on how to create a sliced text effect in Canva useful! Click here to read our comprehensive Canva Guide. If you are interested in downloading Canva or trying Canva Pro for free, click here. Below are several related Canva tutorials that you might find useful:


