How to Add a White Outline Around Photos (YouTube Thumbnail Effect)

Written by Casey Botticello
Disclosure: Some of the links below are affiliate links, meaning that at no additional cost to you, I will receive a commission if you click through and make a purchase. For more information, read our full affiliate disclosure here.
Adding a white outline (also called a white silhouette) to your photo is a great way to highlight a person or an object in a picture. This effect is frequently used in popular YouTube videos, as the video’s thumbnail. This Canva tutorial will teach you how to create a white outline around your photos in Canva, in just a few, simple steps!
For the purposes of this Canva tutorial, we will be recreating the image seen below, although the white outline effect can be applied to any image background.
Steps to Create an Image with a White Silhouette Background
1. Select Your Image
Canva offers a wide selection of images. Select an image in Canva. In this example, we’ll use one of Canva’s free images. Specifically, the photo of of a woman with a dark blue background, as seen below. You can find this image by searching for “person” under the photos section of Canva:
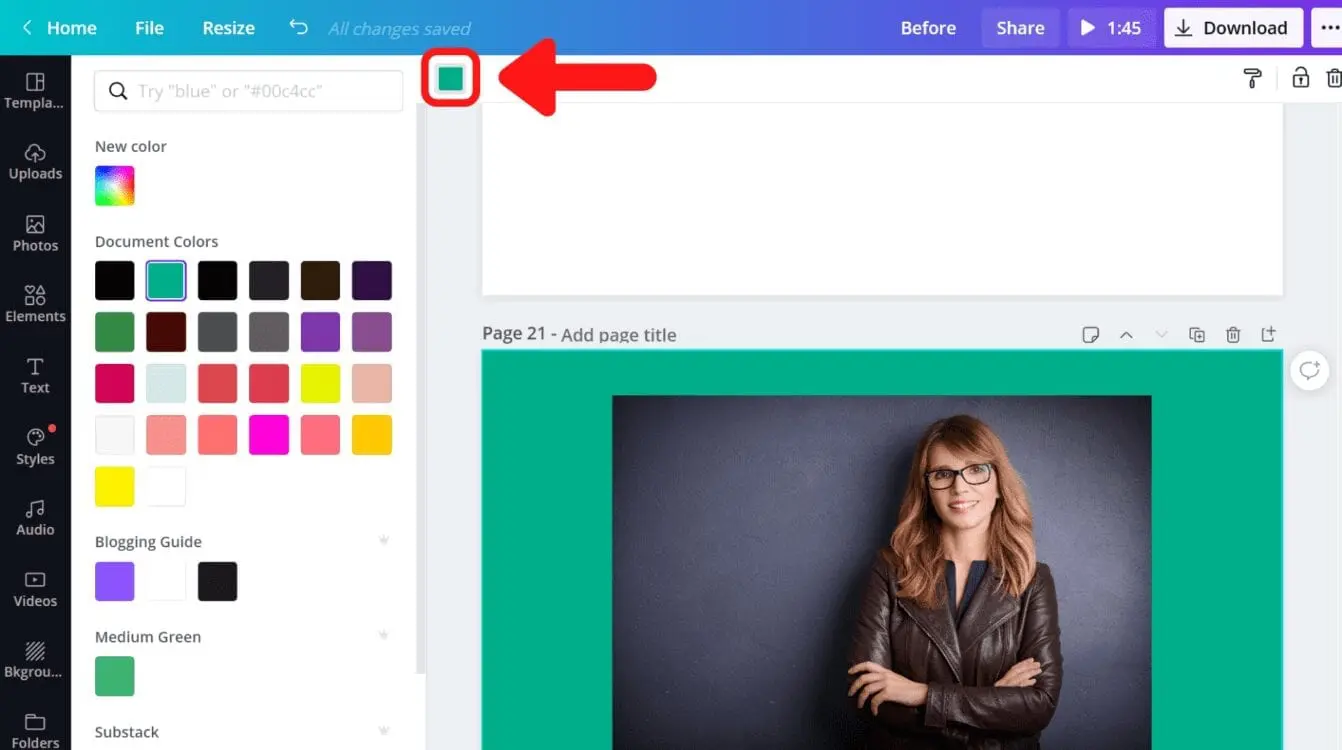
2. Change the Background Color
Next, we will change the background to a green color. While you can use any color for the background, avoid white since it will make it harder to see the contrast between the background and the white outline.
3. Remove Background Image
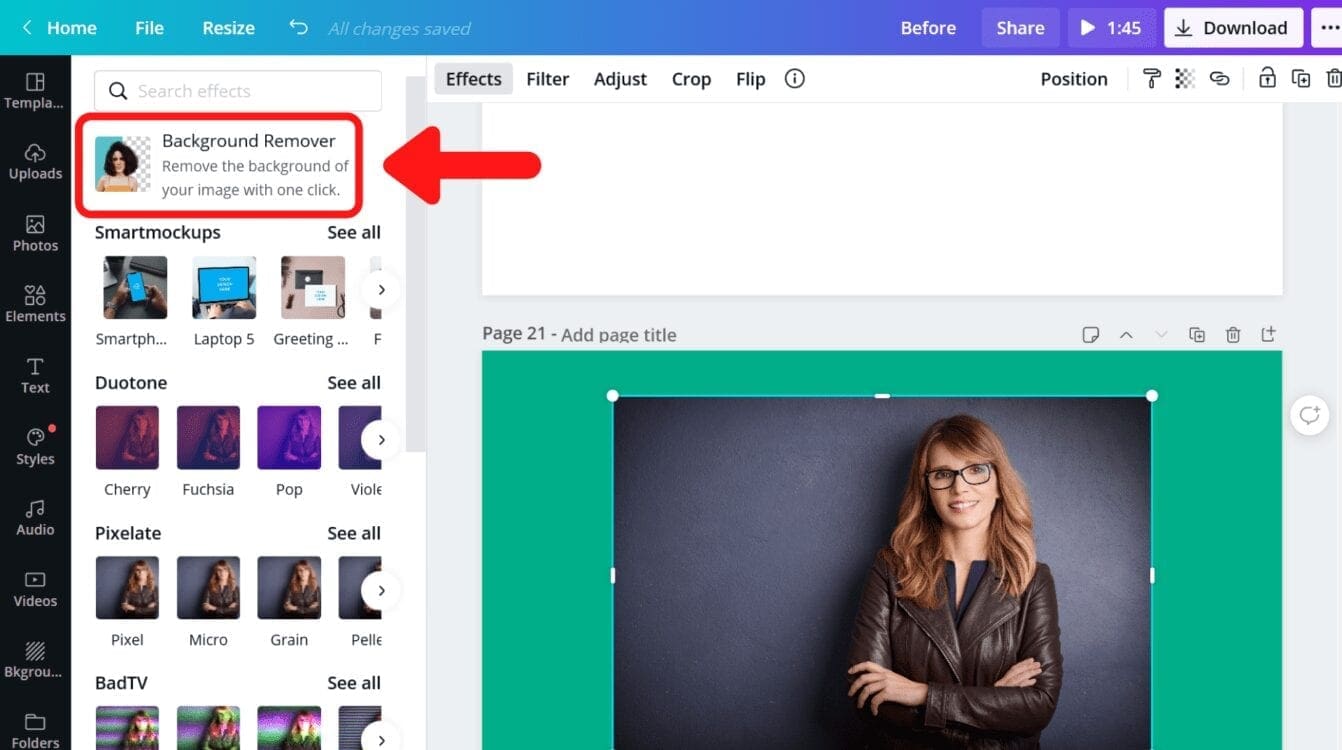
The next step is to remove the background from the image. To do this, click on the image, click on effects, and click on background remover tool on the left hand menu.
Note: This method only works for Canva Pro users. If you have the free version of Canva, and want to make you image background transparent, you can use RemoveBG as a free alternative.
4. Duplicate The Background-Free Image
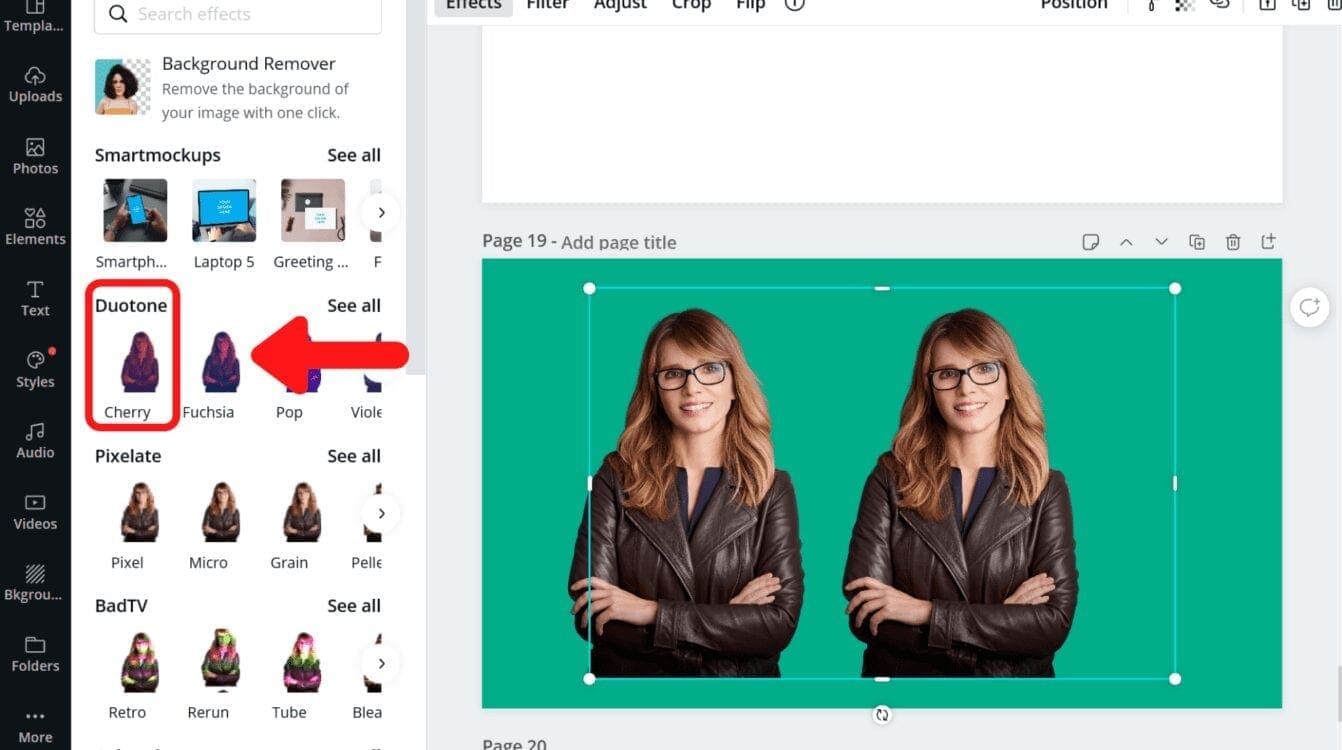
Next, we are going to duplicate the background-free image. Click on the duplicate icon in the upper right hand menu:

5. Edit The Second Image Using Duotone
The next step is to edit your image using Duotone Effects, one of the built in effects offered by Canva. To do this, first click on one of your images of the woman. This will be your image background (the part changing color). Select the “effects” button from the Canva toolbar. Next, click on the Duotone icon. Under Duotone, click on the option labeled “Cherry.” This will create a red stylized version of the photo of the woman.
6. Adjust the Duotone Settings
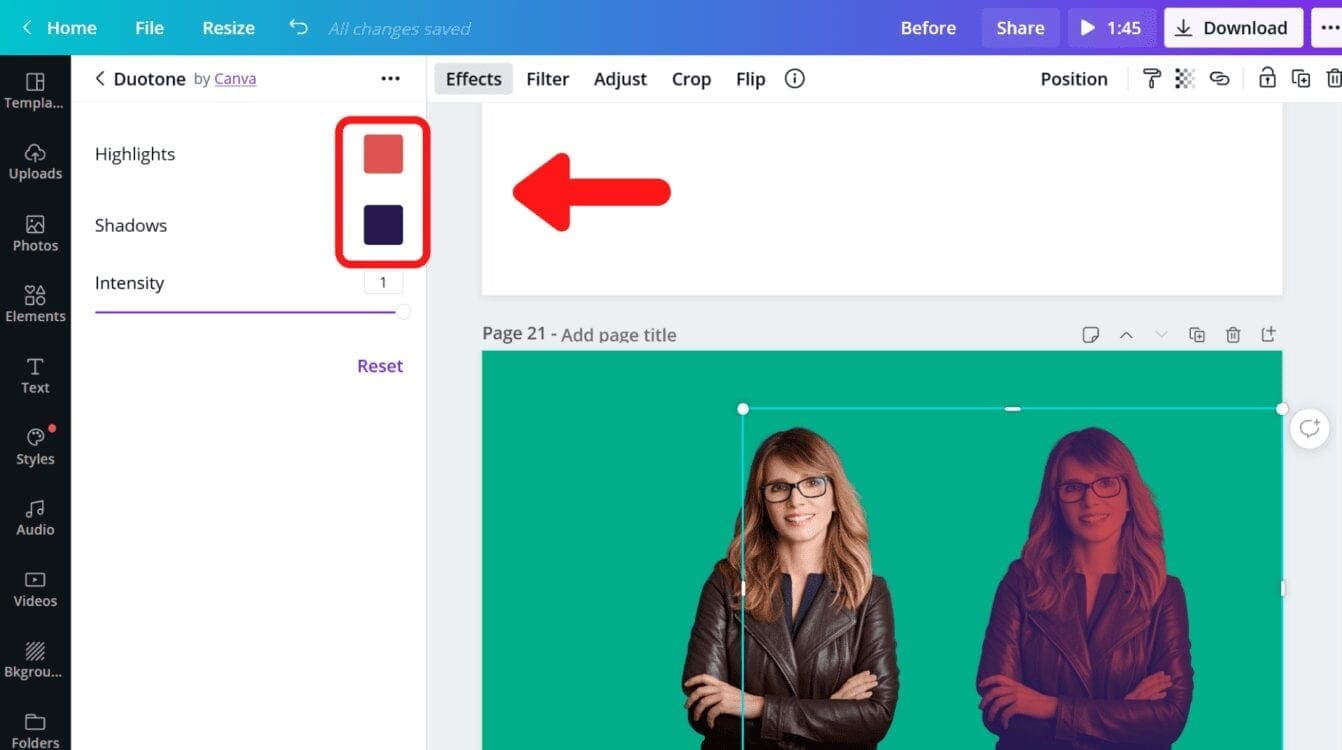
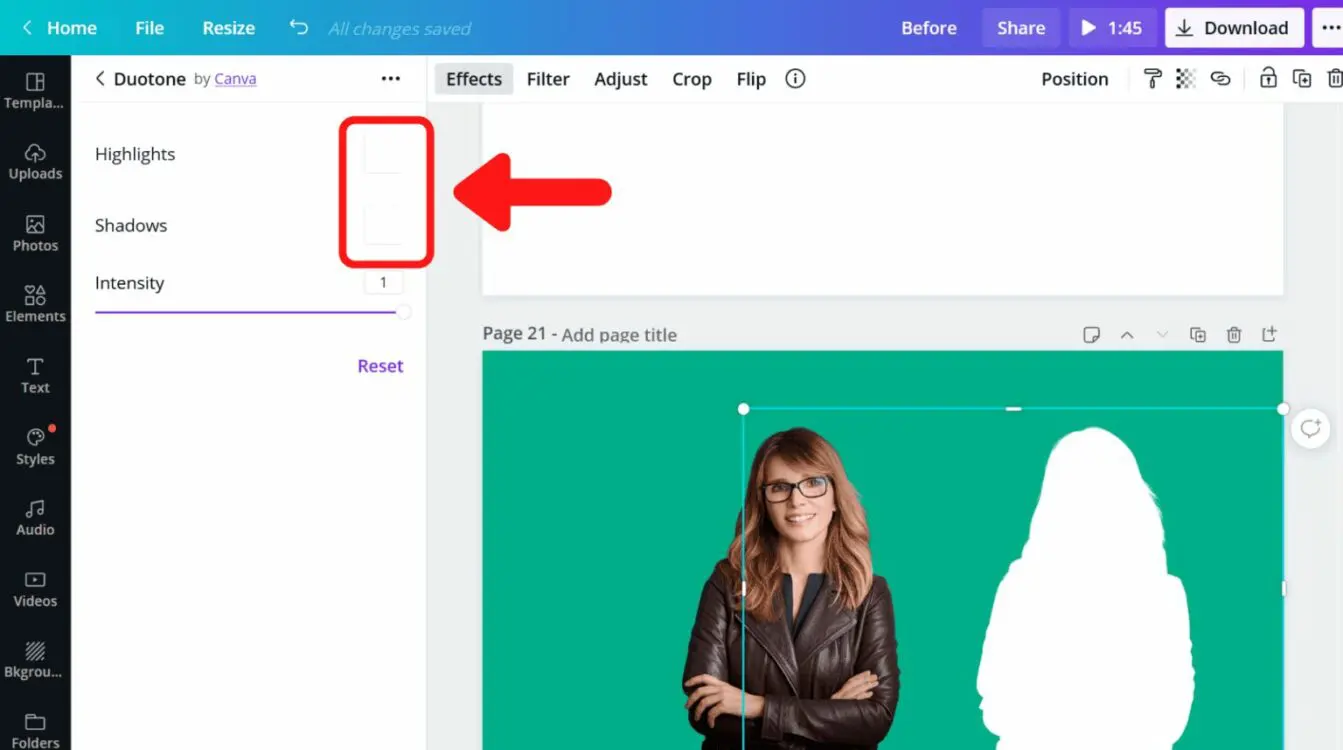
The next step is to adjust the duotone effects and colors. Edit both the “Highlights” and “Shadows” so that they are both set to a white color (hex color #ffffff). Keep the “Intensity” set at one.
7. Drag Clear Image Over the Blurred Background Image
We can now drag the original image of the woman over the solid white background. Next, increase the size of the background image ever so slightly.
8. Drag Clear Image Over the Blurred Background Image
We can now drag the clear image of the woman over the blurred background and center both images. Make sure that the clear top layer image is slightly smaller than the solid white background image.

9. Group Images
Next, you should group the two images. To do this, click on the green background, press CTRL + A, to select both images.
While both images are selected, press the group button to keep the two images permanently fixed together.

Final Product
Now that the images are grouped together, you can increase (or decrease) the size of your image, while maintaining the ratio of your image to its white outline.

Conclusion
Canva is an amazing graphic design tool, and I hope you found this tutorial covering how to add a white outline to photos useful! Click here to read our comprehensive Canva Guide. If you are interested in downloading Canva or trying Canva Pro for free, click here. Below are several related Canva tutorials that you might find useful:


