How to Adjust Layers in Canva

Written by Casey Botticello
Disclosure: Some of the links below are affiliate links, meaning that at no additional cost to you, I will receive a commission if you click through and make a purchase. For more information, read our full affiliate disclosure here.
How to Adjust Layers in Canva
1. Add Desired Elements
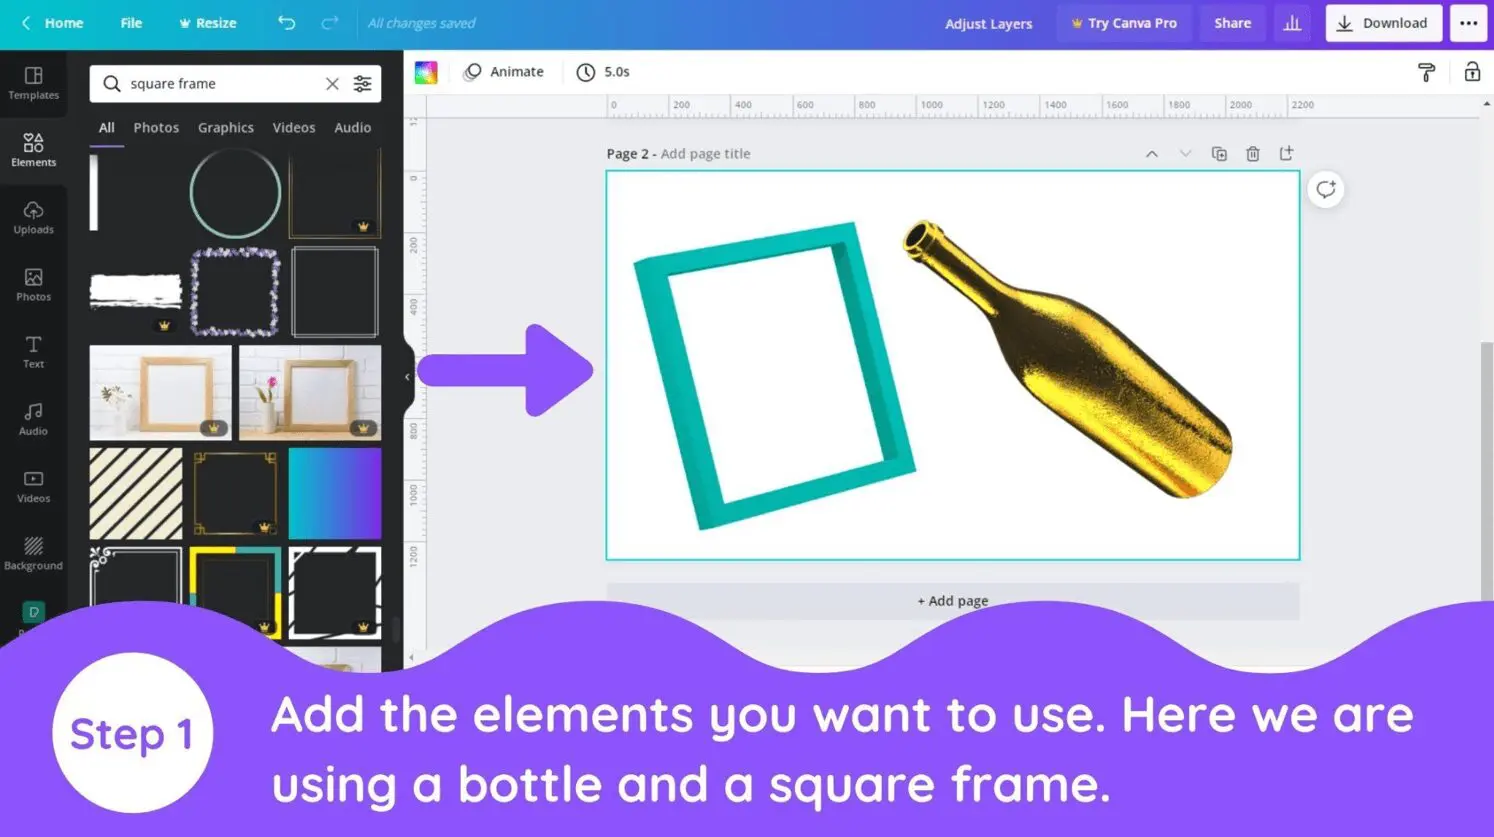
Add the elements that you want to use to your Canva design.
2. Duplicate Original Image
Here we have this bottle and cool frame that we want to layer. Just put your main element behind the element you want to set as a frame around it. So we will put the bottle at the back of the frame.
3. Insert Original Image Inside Letter Frame
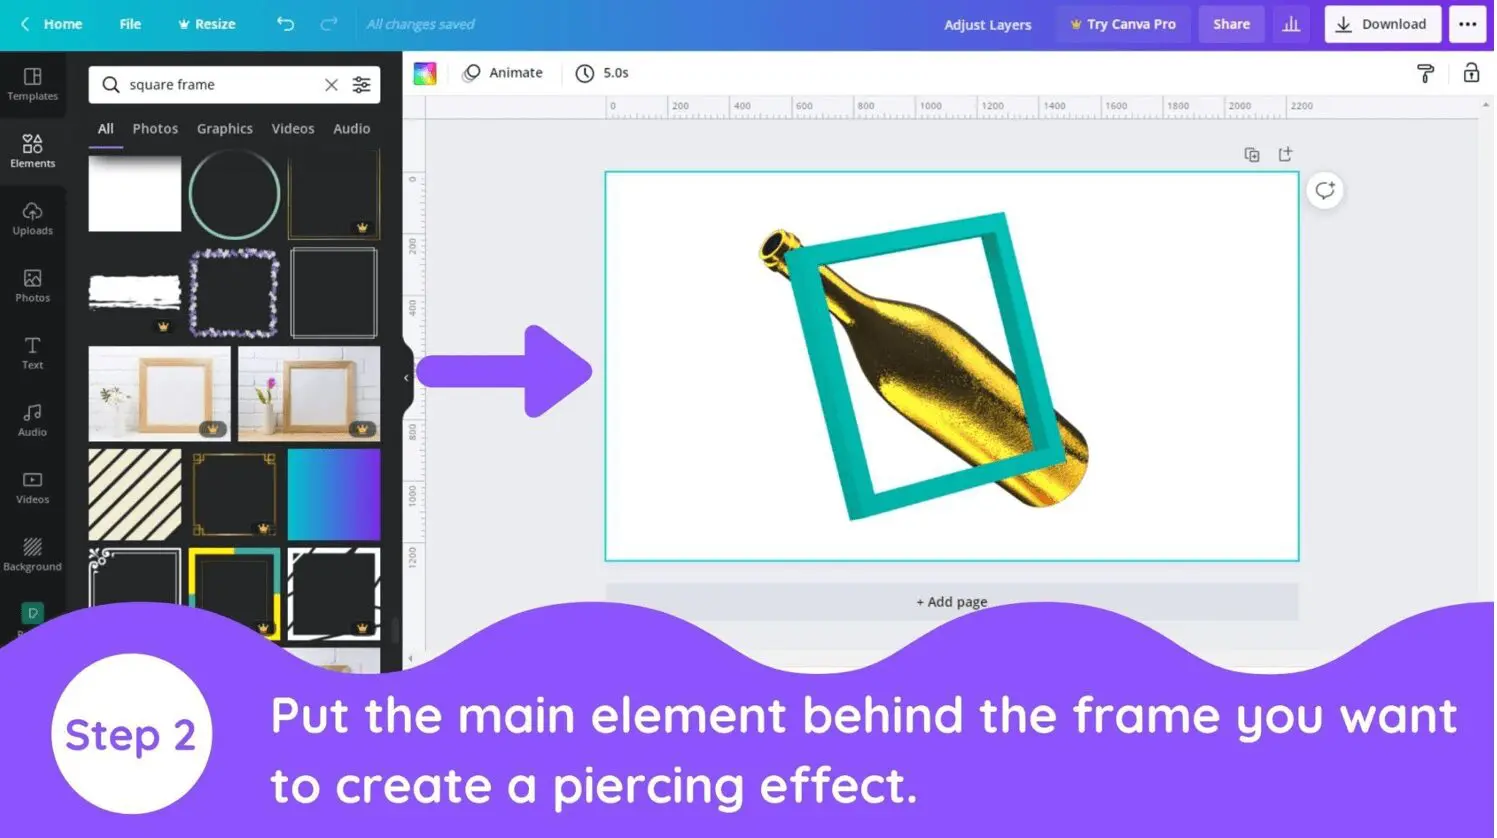
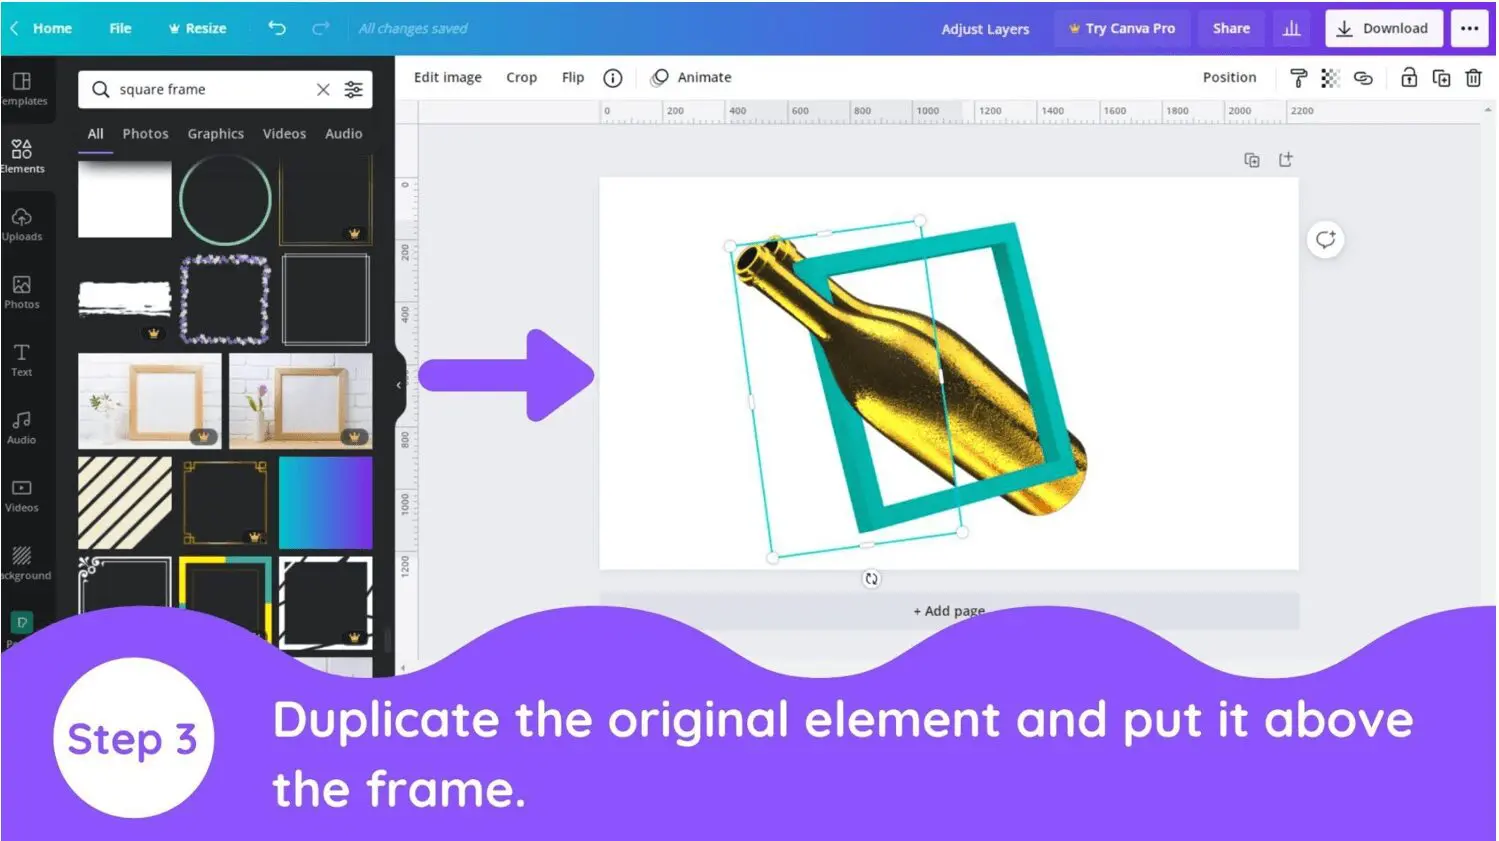
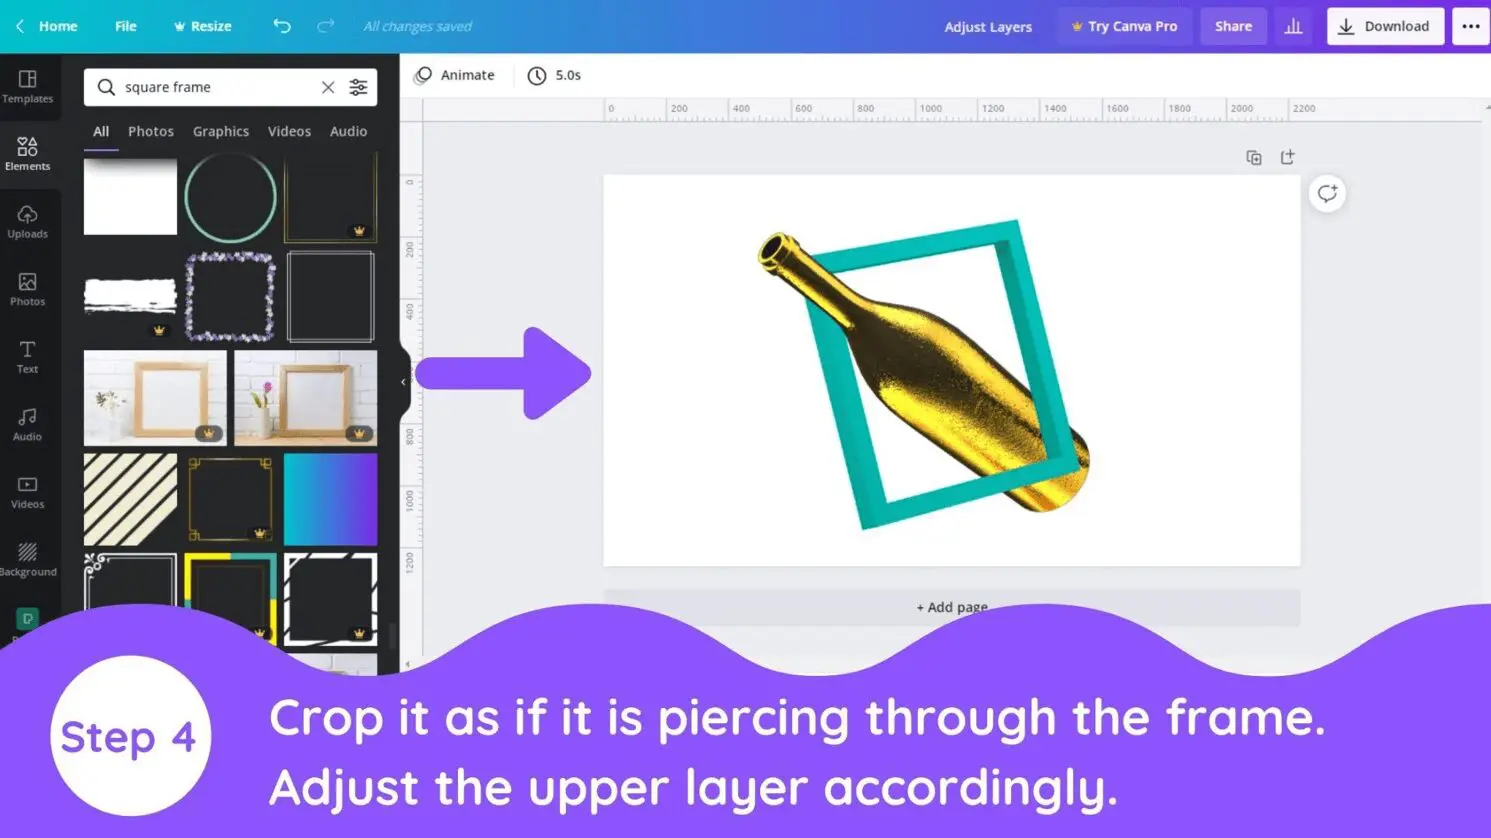
Copy the original element and put it above the frame. Crop it as if it is piercing through the frame. It may take multiple-layer if the frame is multi-angle. Here it took only one layer to adjust.
4. Insert Original Image Inside Letter Frames
Put the second element on the frame and the first element precisely. It will give you a good split-through effect.
Conclusion
Canva is an amazing graphic design tool, and I hope you found this tutorial covering how to adjust layers in Canva, useful! Click here to read our comprehensive Canva Guide. If you are interested in downloading Canva or trying Canva Pro for free, click here. Below are several related Canva tutorials that you might find useful:

